.....
.................
Lately I've been working on about 4 areas at the same time. I had run a lot of the electrical wiring and figured out that I needed to run my drain lines as it is easier to run wiring around pipes than it is to make pipes go around wires.
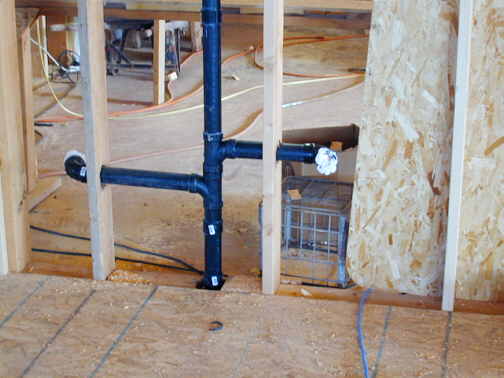
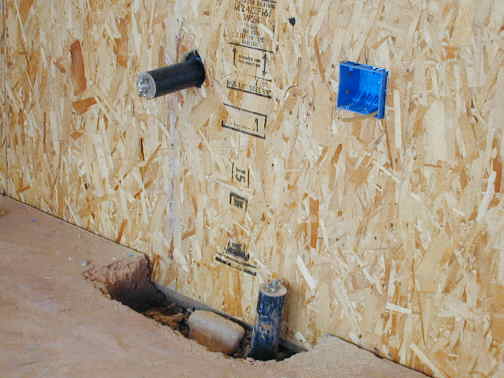
The picture above shows the sink drain for the kitchen on the right and the drain for a deep sink in the shop on the left. All of these lines are 2 inch ABS. Just out of the picture at the top I have also installed a "T" clean-out that I can get to from the shop side of the wall. This would give me a place to clean out this run since you can't do it from the attic or roof.
.................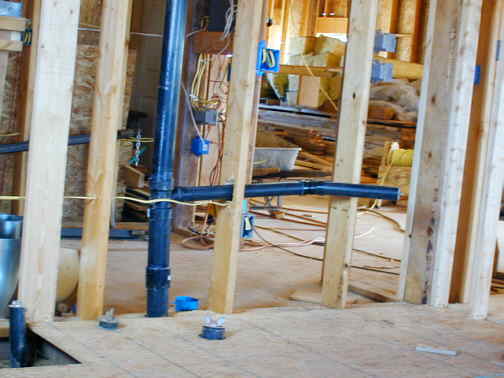
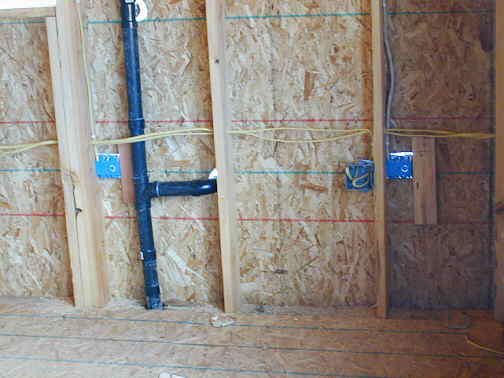
In this picture we see the bath sink drain on the right. The main 3 inch stack in the middle. In front of the stack in the floor is the drain for the toilet that went in before the slab was poured and all the way to the left is the drain for the tub/shower, which also went in before the floor was poured.
.................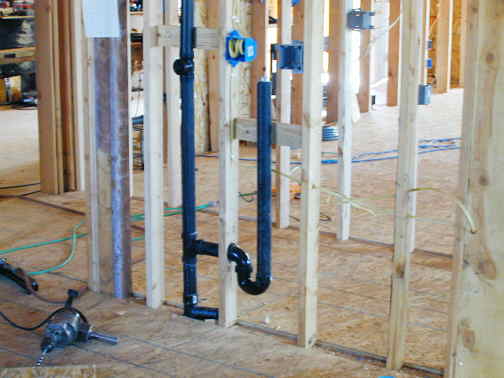
Here is the 2 inch drain for the washing machine. It is plumbed into a 2 inch stack that goes up into the ceiling and then over to the 3 inch main stack. It drains out under the slab into the main 3 inch drain line. Up the stack pipe a few feet you can see a "T" clean-out. This is necessary to clean out any plugs in this run of drain line as you can't clean this section from the attic or roof.
The 1/2 inch drill on the floor came from my dad and I'm guessing that it is around 70 years old. I have 2 that are the same. It is heavy, but has a lot of power and I remember him each time I use it. Thanks, Dad.
.................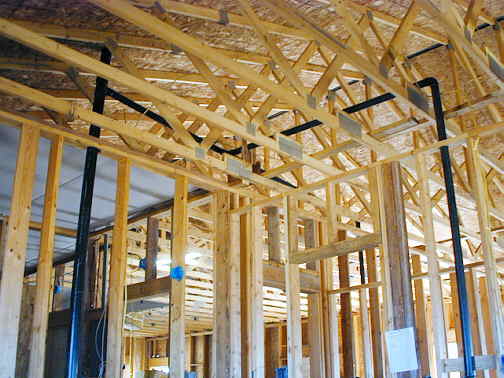
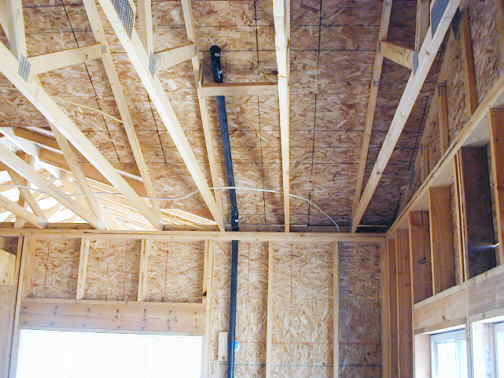
This picture shows how all of the stacks in the pictures above tie into each other and vent out the roof. The 2 inch stack to the right is from the washing machine and it goes up and over and ties into the 2 inch horizontal pipe coming from the stack that is for the kitchen sink and the shop sink. That pipe goes over and ties into the 3 inch stack rising from the bath area. The 3 inch stack vents out through the roof. The horizontal runs actually slope up at better than 1/4 inch per foot so that any condensation or rain water in them will flow down and out the main drain. The slope also ensures that the gases in the sewer will flow up and out the roof.
.................
This is the plumbing for the sunroom. The bottom drain will be for future use of maybe a hot tub. The top wall drain will be for a deep sink to use in the sunroom.
..................
Here is the sunroom drains from the living room side. At the top of the picture you can see the the "T" clean-out that is in the stack. This would make it possible to clean from either the roof or this clean-out.
.................
The 2 inch stack and vent for the sunroom are too far over to tie into the 3 inch stack over at the bathroom, so I ran this stack up the roof a ways before it exits out through the roof.
So I ended up with 2 of the stack going through the roof. I like as few holes in the roof as possible to avoid problems down the road. I got some flashing for the two stacks that is designed to work with metal roofing.
Well that is it for the drain lines. It took about 3 partial days to get them in.
..........................................................................Next Page
.................