..................
.....................................--- Zodiac Raised Transom ---
When we were looking for an outboard for our Zodiac we wanted a long shaft, so that it could be used as a backup motor on the MacGregor in case the Honda on it had a problem while we were out. We found a used 5 HP Tohatsu on Craigs list in San Fran and bought it.
So now the problem was that inflatables are generally setup for short shaft outboards and we had a long shaft that is 5 inches longer. This presented a couple problems. One the propeller would not be at the best performance position at the bottom of the boat and would also hit the bottom quicker in shallow water and we got the inflatable in order to go ashore and also to explore the slot canyons of Lake Powell.
I called Zodiac and talked to a technician about raising the transom. I wanted to do this, but worried about hurting the integrity of the boat with the motor providing thrust further up on the transom. He said that he wouldn't worry with the 5 HP as the boat is rated for up to an 8 HP and said that if it was his he would raise the transom so that the boat would be better handling and more efficient. So I raised the transom.
...............![]()
Here is the boat with the stock transom. The boat is a 2006 285 Zoom that Zodiac made for Boaters World to sell. We bought it off of Craigs List out of Florida.
...............![]()
Here is an inside view with the stock transom and a 3 gallon tank that we bought that mounts to the transom. We are very happy with this tank and the way it mounts.
...............![]()
I removed the board that was on the back of the transom and made a new one from 1/2 inch marine plywood (all the plywood on this project is 1/2 inch marine).
...............![]()
Next a piece was cut that was wider and sits on the top of the stock transom.
...............![]()
A view of the other side. Another piece was cut to fit on the transom also in front of this one, but is not shown here. The two were almost (close enough) the same thickness as the transom.
...............![]()
I took the two boards that sat on the top of the transom and rounded the edges by taking a couple appropriate tin cans and drew tangent circles on the plywood (arrows) and cut the plywood with the saber saw in the foreground.
...............![]()
Altogether 4 pieces of 1/2 inch plywood were sandwiched together for the new top to the transom. Attached to these was this motor plate. The outboard screw clamps that hold it to the transom would not quite retract enough for the motor to go on the transom. I took the motor place and milled a couple low spots so that I could mount the motor. I did them off center so that once the motor was placed on the transom it could be slid over and centered and there would still be the safety lip there in case the motor became a little loose.
...............![]()
The pieces were then screwed and bolted to the transom for a trial fit. The top and bottom arrows point to screws that go part way through and the center arrow points to 4 bolts that go completely through the transom and sandwich all the new pieces to the transom.
...............![]()
Another view of the back.....and .....
...............![]()
...... a view of the other side with the final piece that hadn't been shown to this point.
...............![]()
Here is the whole assembly with the tank mounted.
...............![]()
An a view of the tank from the other side.
...............![]()
The pieces that make up the transom extension.
...............![]()
Once I felt good about the fit I painted all of the pieces on both sides. Here is a tip that might help someone. I took some short pieces of wafer board and ran grabber screws through them. Now I could paint one side of a piece and turn it upside down while still wet and place it on the screws and paint the other side. I would end up with the good side up.
...............![]()
An bear with me on another tip that you might not know. When you open a paint can the first time take a hammer and a nail and punch holes around the recessed part of the top of the can. Then if you are painting out of the can or stirring it and the paint gets into this recess it flows back into the can and when you put the lid on the rest flows back down into the can and the lid still seals the can. Learned this from a painter a long time ago.
...............![]()
The pieces with a couple coats of paint. I took the piece off the back of the original transom to the paint store and they were able to...........
...............![]()
...... match it pretty close.
...............![]()
The finished transom with the fuel tank in.
...............![]()
Here it is with the Tohatsu mounted ......
...............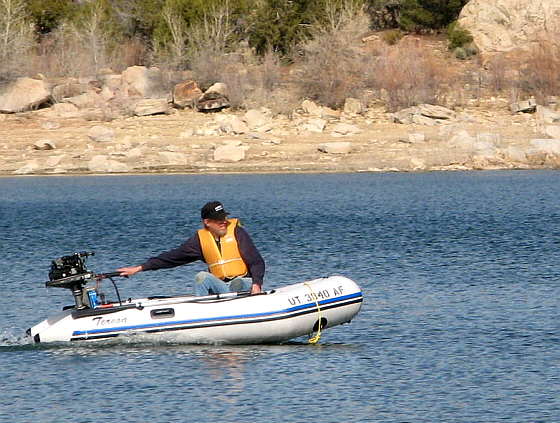
...............and running down the lake up on plane. I'm happy that I did this and it seems to work fine on the boat.