..................
...........................................................................--- Oarlock ---
Since we will be doing hopefully a lot of sailing on Lake Powell as it is the closest large lake to us at 90 miles we decided to get a dingy to explore the many slot side canyons on the lake and to use later if we ever go to the Keys or some place where it would be a good idea to have an inflatable. We started searching Craigs List as there aren't too many inflatables here in the desert. We found a nice one at a real reasonable price in Florida from a private individual. Part of the reason for the good price was it was missing the part of the oarlock assembly that holds the oar on the port side. The seller was very honest about this missing part. The boat is a Zodiac 285 Zoom that they made as a special model for Boater's World. I called Zodiac and they gave me the part number for the whole oar assembly and said that it was about $35.00. I called a dealer in Florida and ordered the part. Well 3-4 weeks later and still no part after 2 more phone calls. I gave up and instead of calling another dealer went on to do one of the stupid things I seem to do more often than not. In this case I made the part for the oar. What follows is the build that probably took at least 10 hours in whole, so I didn't pay myself much for my time.
...............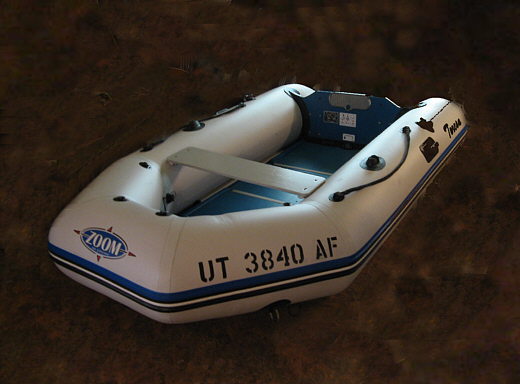
Here is the Zodiac. It was in good shape and we are very pleased with it at this point even though we haven't tried it out yet due to the local lake still having ice on it. We did register it since it will have a 5 HP long shaft outboard on it and applied our numbers to the bow. I'm going to raise the transom for the long shaft motor, but that will be another build page. We wanted the long shaft so that we would have a backup motor with us for the Mac.
...............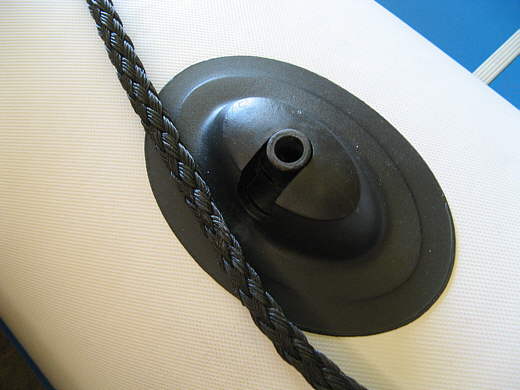
Here is the complete oarlock assembly on the starboard side of the boat. What was missing on the other side was the center section that holds the oar. If we would have gotten the new assembly we would have had to cut this whole assembly off the boat, carefully, and glue the new one on. If it does finally come I'll keep it as a spare.
...............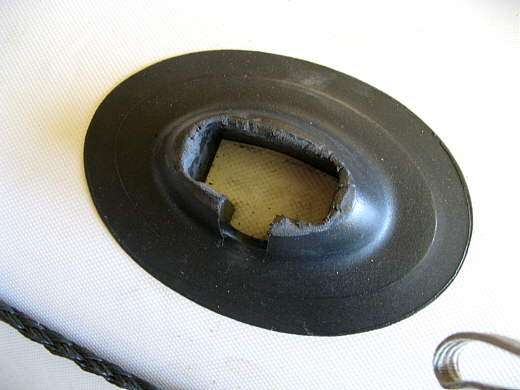
Here is the other side and at this point I've cut some of it away to make room for what at this point I hoped to make.
...............
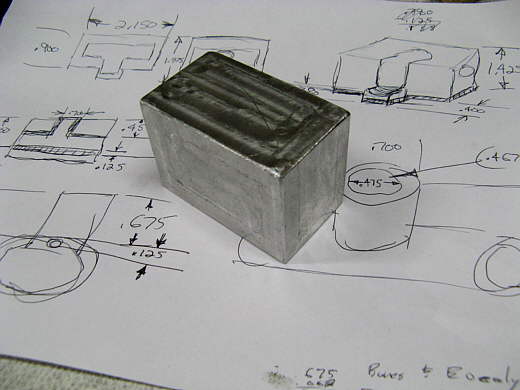
I took some measurements and made this drawing. The two main components are the center rotating section that actually holds the oar and the housing around it that will fit in the pocket on the oarlock rubber body in the previous picture.
...............
For the body I started with a piece of scrap aluminum block and sawed off a piece larger than what was needed.
...............
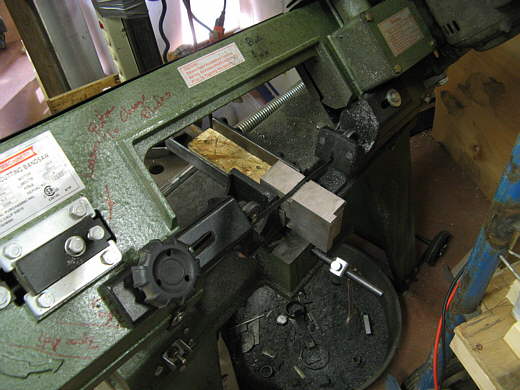
Next it was machined to the final size that would make up the housing for the rotating center part. This was done on the mill.
...............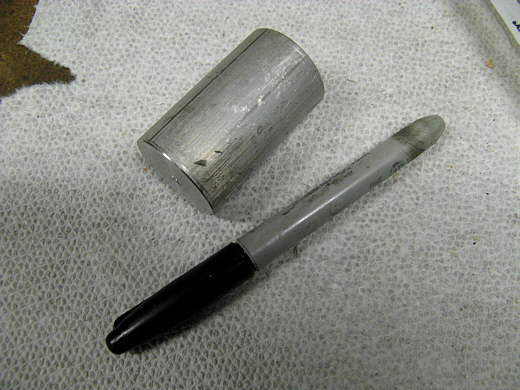
This scrap piece of round stock was used to make the center rotating piece.
...............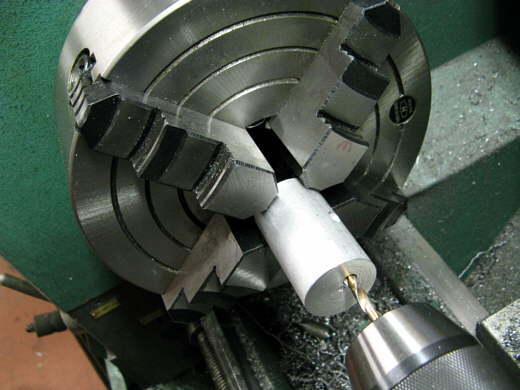
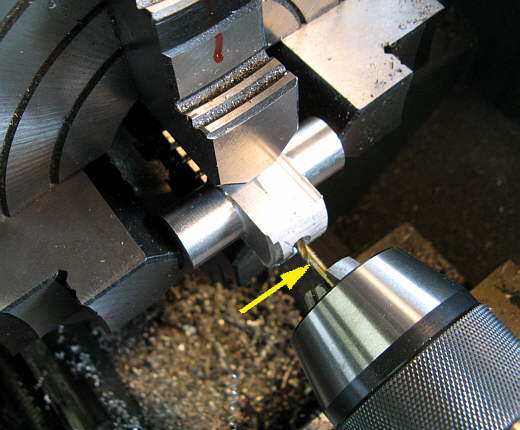
First a hole was drilled from one end to the other off center. I put the drill bit that was used to make the hole in the chuck on the lathe tail stock and moved it up to the 4 jaw chuck. With it in place I adjusted the independently moveable jaws on the chuck to hold it off center, centered on the drill bit.
...............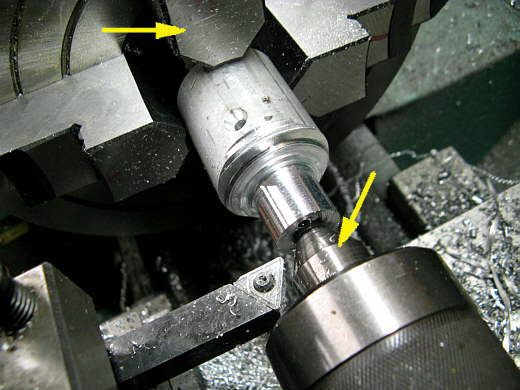
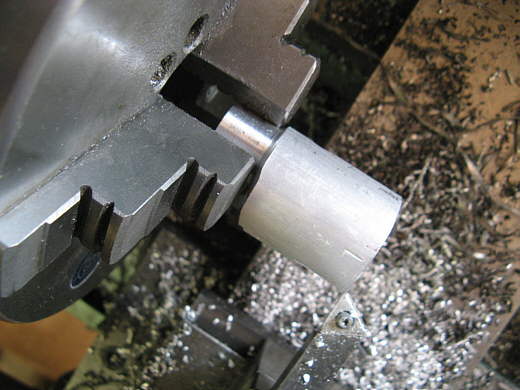
With the stock held in the chuck (top) arrow and supported at the other end with the live center in the tailstock I turned one end down to the diameter that I wanted based on my drawing (about .010 under 3/4 inch).
...............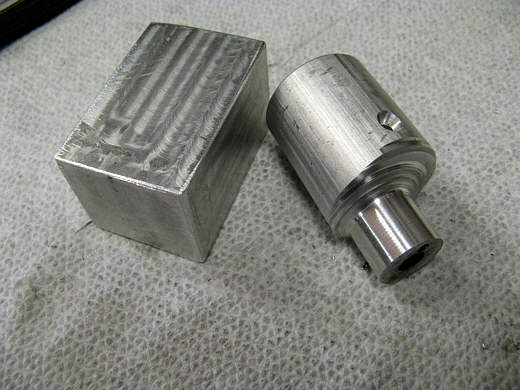
The two main pieces at this point.
...............
The round piece was then chucked into a 3 jaw chuck, so that it was centered on the newly machined end on the left.
...............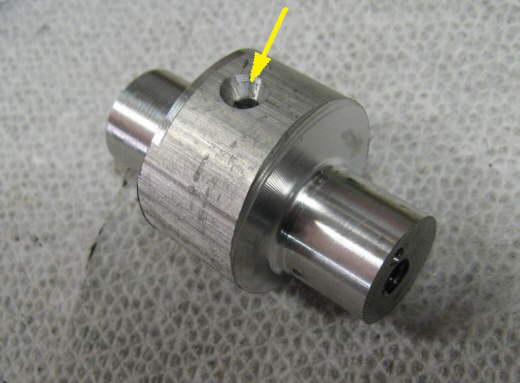
The other end of the rotating assembly was then turned. The arrow points to a locator hole drilled previously at right angles to the just turned ends. It will be used in a minute.
...............
Some of the rotating assembly was trimmed away with the mill at this point.
...............
Next the piece was located in the 4 jaw chuck using the hole that had been drilled at right angles to the previously turned ends. Like before the piece was held with a drill bit in the tailstock and moved into the 4 jaw chuck and then the jaws were tighten so that it would revolve around the bit.
...............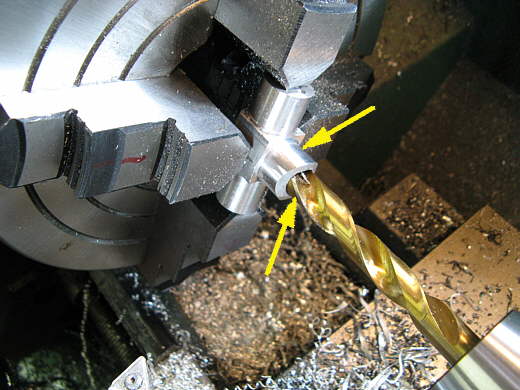
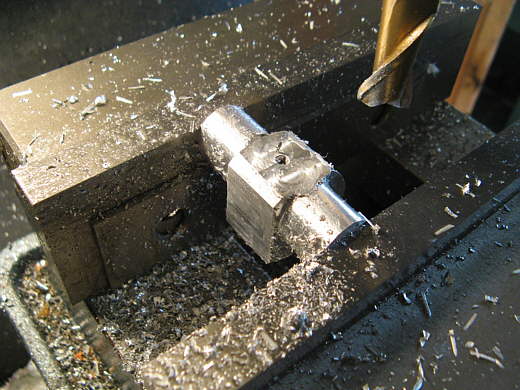
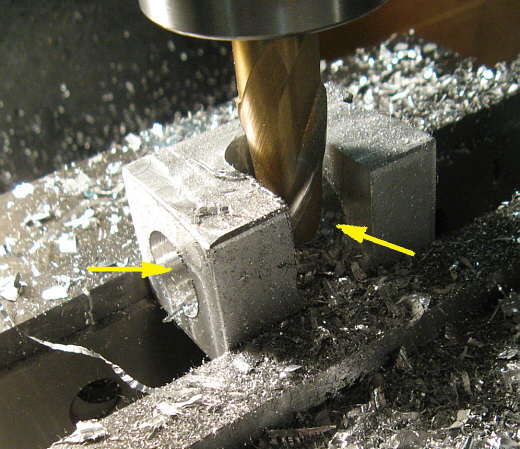
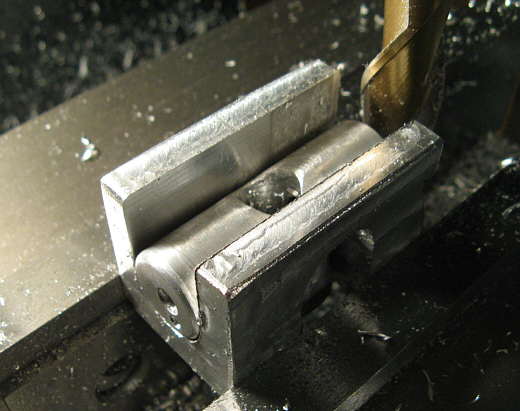
Then it was turned into the desired round shape, again just under 3/4 inch (top arrow). Next a hole was drilled through it (bottom arrow). The hole is the right size to receive the oarlock. Next and not shown the end was squared off and the hole for the oarlock was countersunk to make putting the oar in easier (you can see that in the next picture).
...............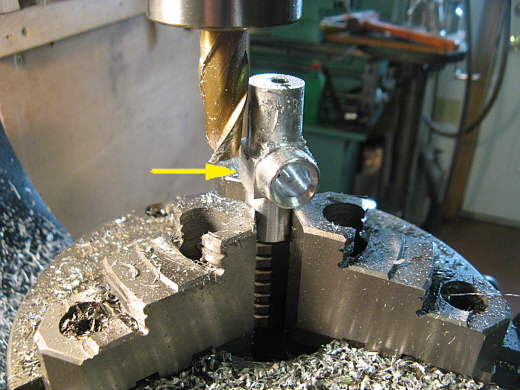
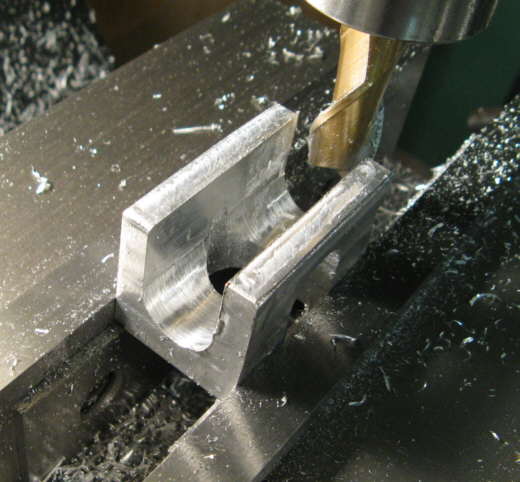
Next the piece was placed in a 3 jaw chuck on the rotary table on the mill. By bringing the end mill up to the piece I was able to rotate the piece back and forth with the rotary table and clean up the squared part on the back side.....
...............
......until it was round to match the turned ends (where the arrows are pointing). At this point the piece has been moved away from the end mill on the left.
...............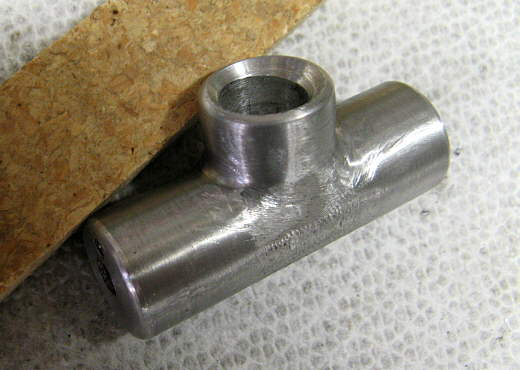
Next with a little file work the piece was about finished.
...............
The oar is located in the oarlock with a groove around the bottom (top right arrow). There is a pin (bottom left arrow) that screws into the rotating assembly's end (top left arrow) that goes into that groove. There is also a groove in the oar pin (hard to see at the bottom right arrow). You lower the oar pin into the assembly and rotate it till the one groove lines up with the pin. The oar then falls a little further into the assemble and is captured there when it is turned to where you will be rowing with it by the pin in the circular groove at the bottom.
...............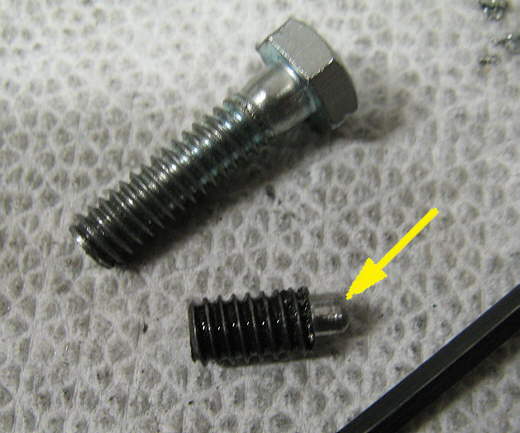
I didn't like the first pin I made in the last picture so I made another one from a shorter screw. This is screwed into the rotating assembly to the proper depth with a hex wrench and then a second one is screwed in against it to lock it in place.
...............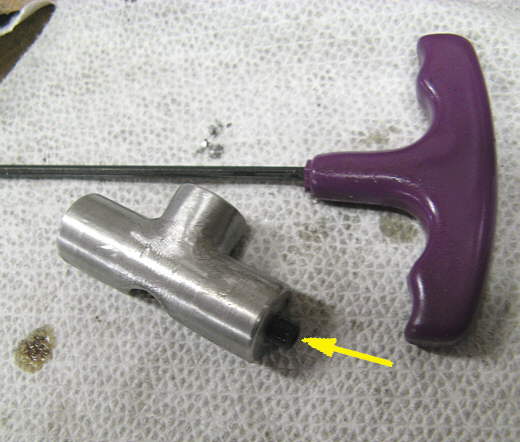
Here you see the pin being inserted into the rotating assembly. When both pins are in the last one is in past the end of the assembly.
...............
Now to finish the housing that will hold and locate the rotating assembly. A 3/4 inch hole was drilled end to end and another two holes were drilled into the first hole at right angles on two sides. Then a 3/4 inch slot was milled in that connected the two holes on the sides.
...............
Another 3/4 inch slot was machined down the length to open up the 3/4 inch hole that had been drilled lengthwise.
...............
Everything was checked by putting the rotating assembly in place in the housing.
...............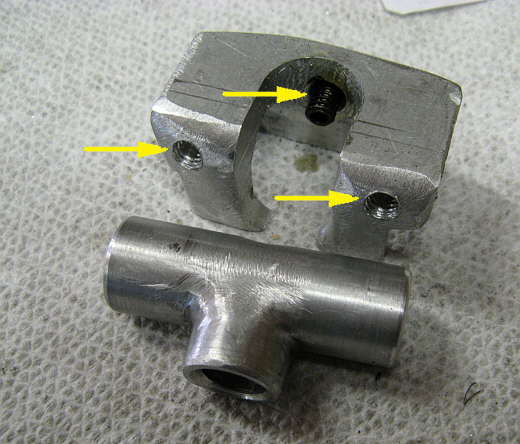
Here are the two main pieces and there have been some holes drilled and tapped into the housing to hold it in the rubber mount on the boat.
...............
One 1/4 inch bolt (I used stainless) goes through the rubber mount on the back and into the housing.
...............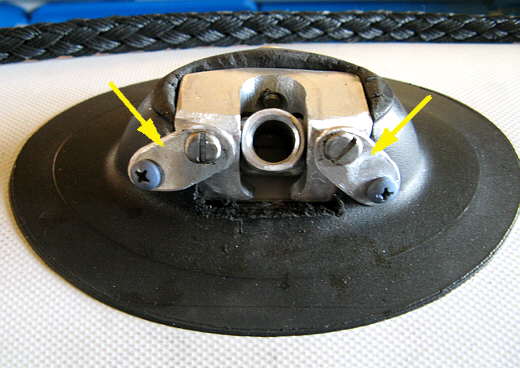
Two short straps help to locate and hold the housing to the rubber mount in the front on each side (I also used stainless screws for these. Everything else I made is out of aluminum.)
...............
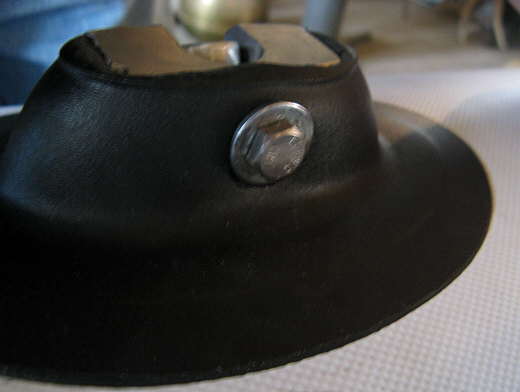
Here is the finished oarlock with the oar in place and in the rowing position and .............
...............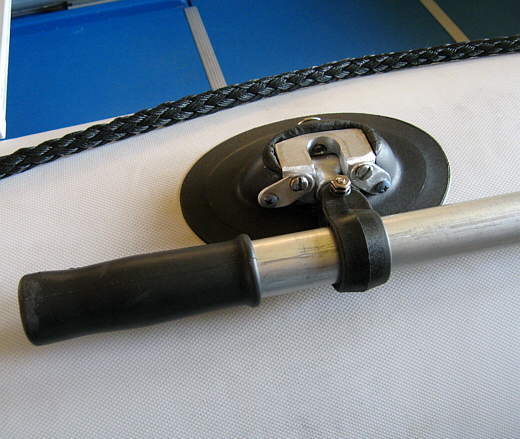
........ here the oar is rotated down in the storage position. There is a snap clamp to the stern that holds the oars in place when they aren't being used.
Well probably pretty stupid of me to spend the time on this, but it was kind of neat doing it and I did some machine work I'd never done before, so that was cool. Now taking an evening to document it also probably has to go down on the dump list as I'm sure no one else would be so foolish to do this and lastly I won't tell you how smart or dump you might be for actually reading all of this to this point if you still are ;-) , Sum