..................
...............--- Swim Ladder Extension -- Pushpit Mod ---
.....................................................................................--- Part I ---
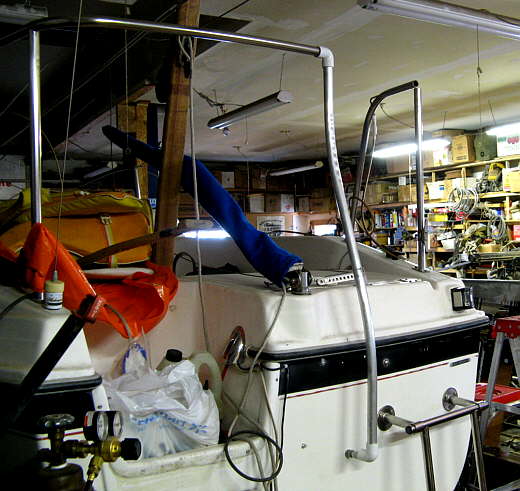
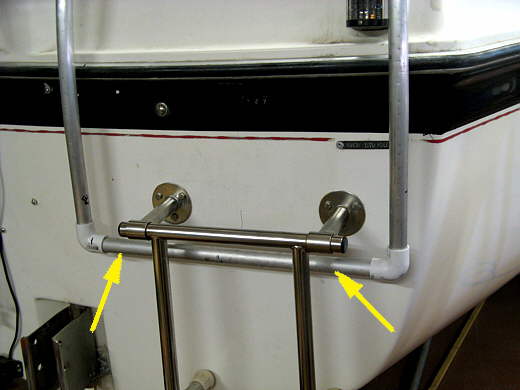
When we bought our Mac it came with a swim ladder and a single top bar pushpit at the stern.
...............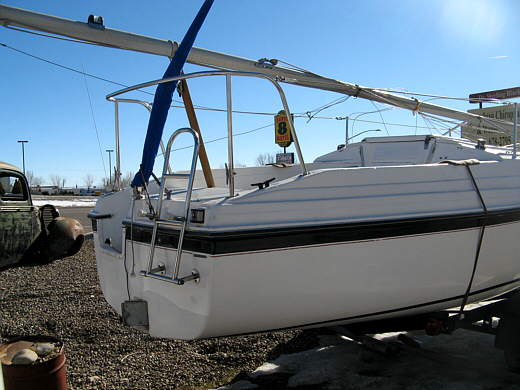
I'm 6-1 and can go up the ladder and step over the pushpit bar, but Ruth is only 5-2 and she can't step over it, so has to either slide under it or try and go around the end of it. Neither of these options for her are very good. Chris on the MacGregor/Venture forum on the Trailer Sailor site also had a similar problem and had a thought of putting a vertical pole from the pushpit bar down into the lazarett to brace it and then open the top of the pushpit and wanted my view on this. While I thought this would work I figured I had the ladder there already, so why not use it to hold the bottom of the new bar either on the inside or outside. I settled on the outside for a couple reasons. One there wouldn't be a need for a hole in the stern for the bar and the bar could also act as a handle in an area that would help Ruth in climbing the ladder.
...............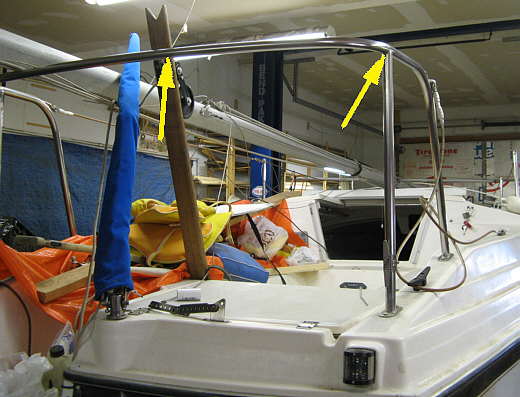
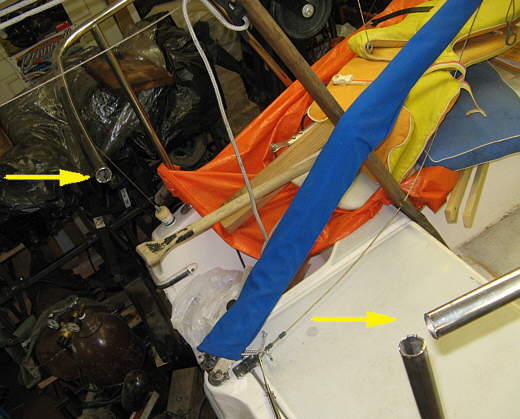
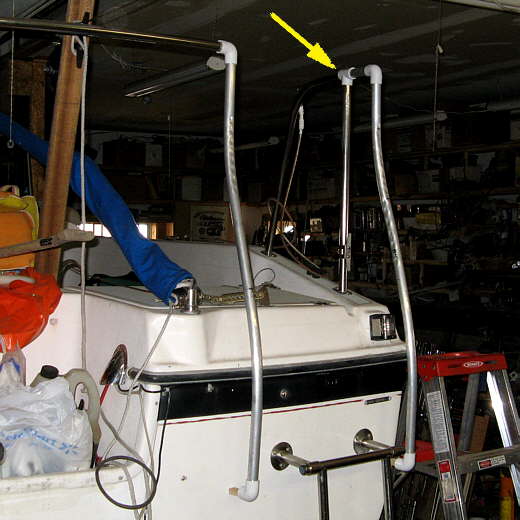
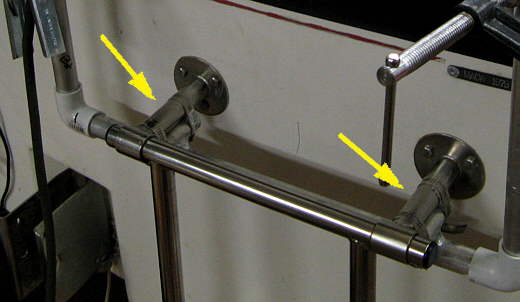
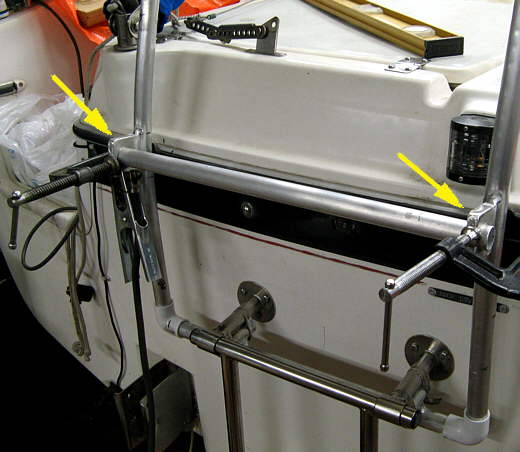
The plan was to cut out the top bar where the arrows are.
...............
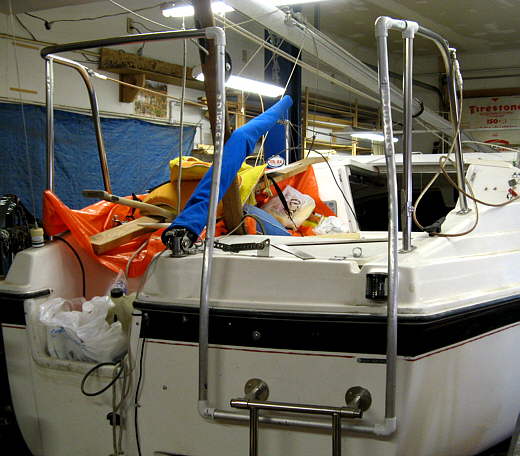
Another view of the area and ......a problem....
...............
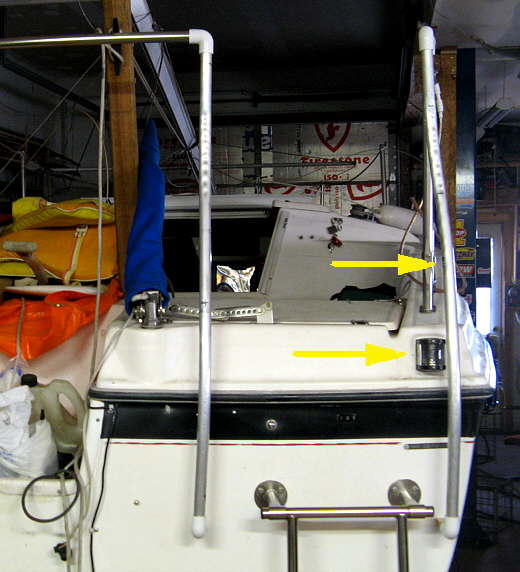
Where the top bar goes past the rear upright it immediately starts into a curved area (arrow to arrow). If I cut it behind the upright how was I going to deal with that curve?
...............
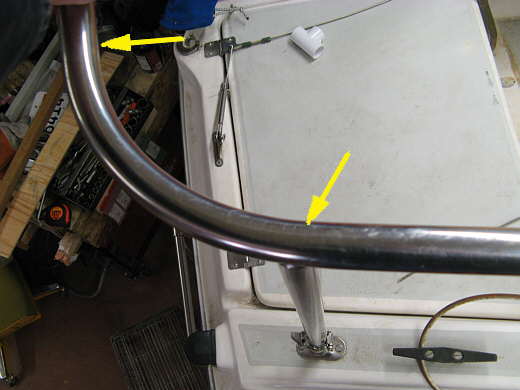
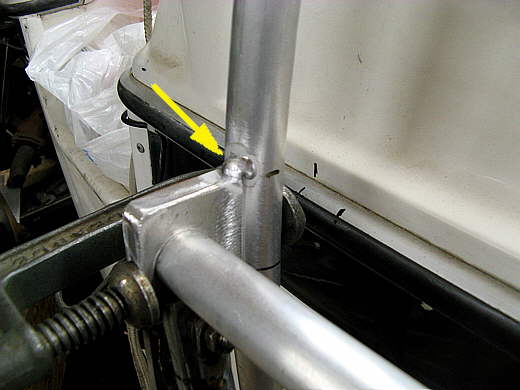
I didn't have much choice but to make two cuts at the upright. One before it (top arrow) and one after it (bottom arrow). Now I was dealing with a straight piece of pipe before the upright and the upright itself.
...............
I made the two cuts at the upright with a cutoff wheel and also on the other side of the opening. It immediately became evident that doing this drastically cut down on the strength in this area and I had my work cut out to restore it. The remainder of the pushpit to the port side would move from side to side and the bar at the cut fore and aft. Things were as bad at the upright. I'd come this far, so plunged ahead.
...............
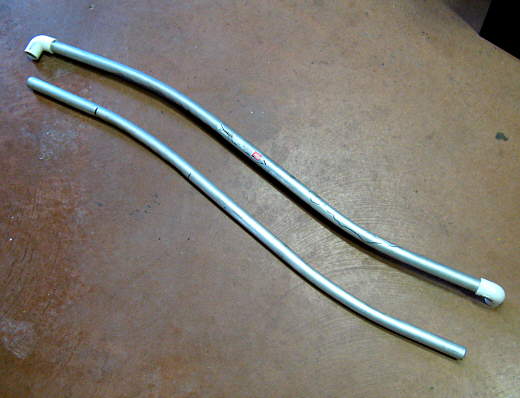
I started bending a piece of 1 inch aluminum tubing I got from the hardware store. It wasn't until later I found out that it is .050 thousands over 1 inch. That might be a problem when I order stainless 90 degree Ells and some Tee's as their ID might be only 1 inch. Well I'll worry about that later for now. My bender isn't meant for round tubing and I didn't want to make one, so I'm putting up with the marks on the bar for now. The plan is to use this for a season and if it works out use the pieces for templates and have someone bend them that has a mandrel bender that won't leave marks.
...............
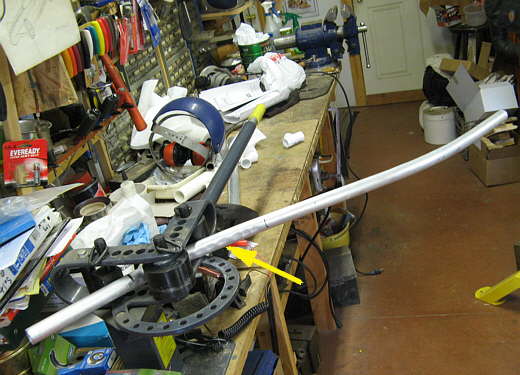
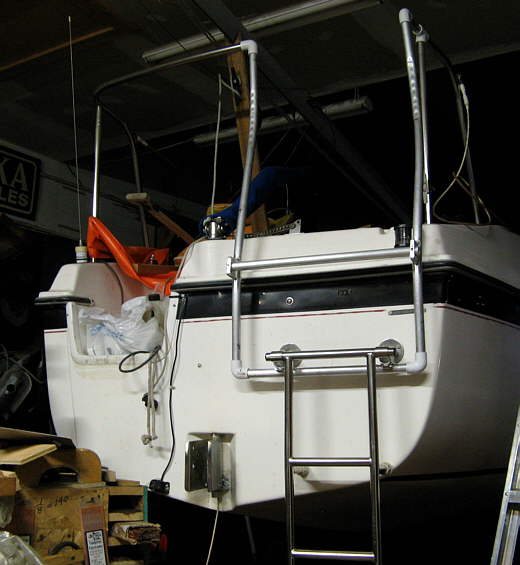
I would bend and then fit it to the boat until I had it .........
...............
....... like I wanted (arrows). Go slow as it is hard, say almost impossible to un-bend a piece. I wanted the upright to come down from the top bar as straight as possible for a distance to help in having a better holding place as you approach the top of the ladder. This bar will be held to the boat down at the ladder and with a brace/bracket just above the bottom arrow. The brace/bracket will bolt to the stern both on the angle vertical part and the flat part above that with bolts that have backing plates inside the lazarett.
...............
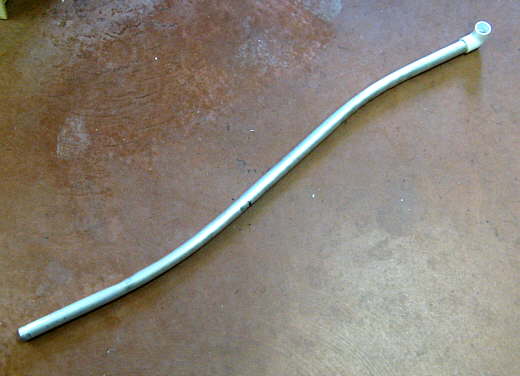
Another view of the first piece. Here I'm using PVC Ells for the fittings. These will be replaced with either stainless or aluminum. This piece still has to be attached to the top of the ladder brace and the top brace will be just to the starboard side of the tiller.
...............
After I was satisfied with the first upright I bent a second one the same.
...............
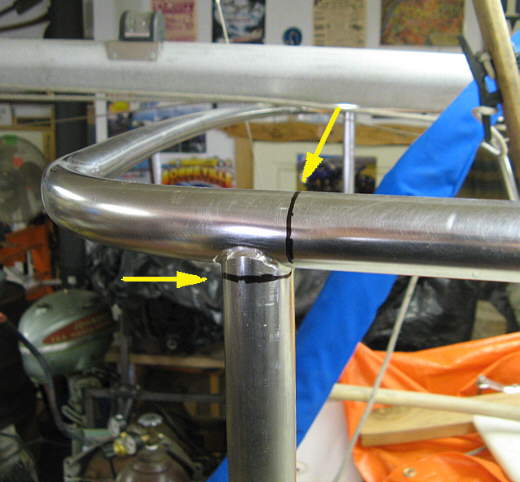
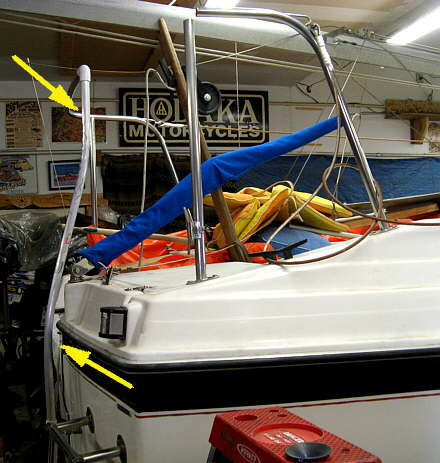
The arrow points to a Tee fitting to joint the upright to the forward support rail and to a short piece of new rail behind it that then connects to the second upright via another ell.
...............
The second upright has the same profile as the first when viewed from the side, but I also had to put another bend in it when viewed from the back (top arrow)so that it wouldn't block the starboard running light (bottom arrow).
...............
Next I added a piece of 1 inch tubing to connect the two uprights at the bottom (arrows). I needed a what to .......
...............
..........connect it to the ladder brace that was bolted to the transom.
...............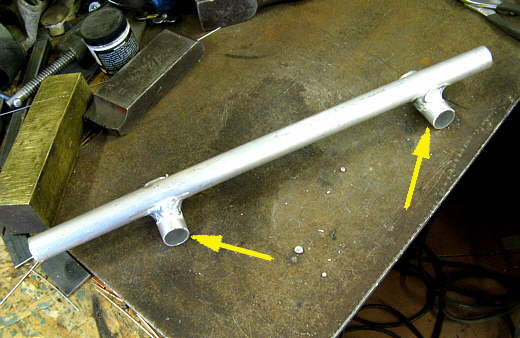
I welded (with the TIG) two short sections of 1 inch pipe to the top of it.
...............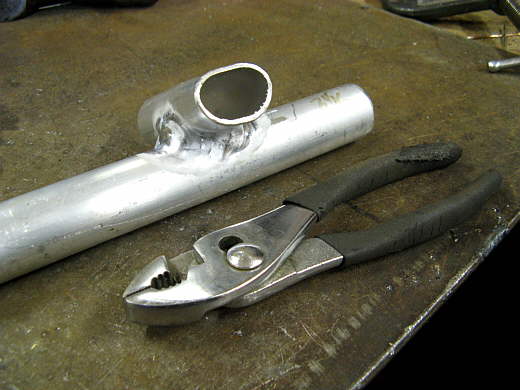
They will line up right under the ladder supports and one end had to be flattened a little to lay flat under there. Looking at these I think I might look at cutting the top 1/2 of them off and just have them saddle the bottom of the ladder supports. Not sure why I didn't think of this when I was making them.
...............
They along with the bottom cross member were then attached to the ladder with hose clamps (arrows). If this all works out there will be a better looking solution here in the future.
...............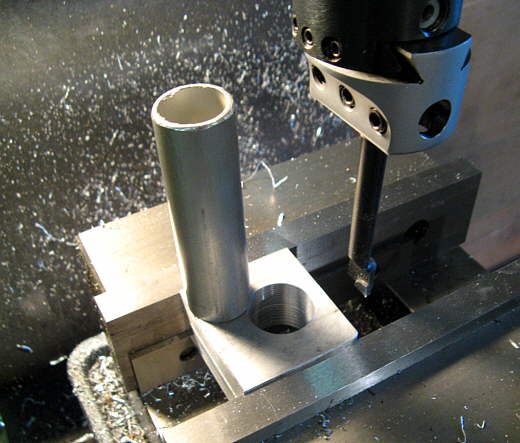
Next I started on adding a couple ladder rungs to the uprights above the current ladder. I drilled two pieces of aluminum out to 1 inch and went to put a piece of the 1 inch aluminum pipe in the holes for a fit. Well it didn't fit. I got the dial calipers out and that is when I found out that my 1 inch aluminum tubing (even has a sticker on it saying that) is really 1.050 inches. I had to get the boring bar out and take it out .050 larger. Not a problem here, but might be when I order fittings to tie all of this together.
...............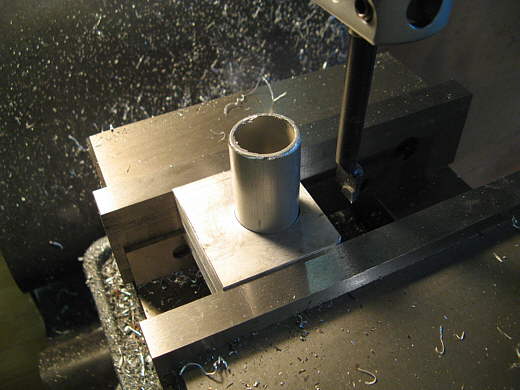
Well after using the boring bar the tubing fit.
...............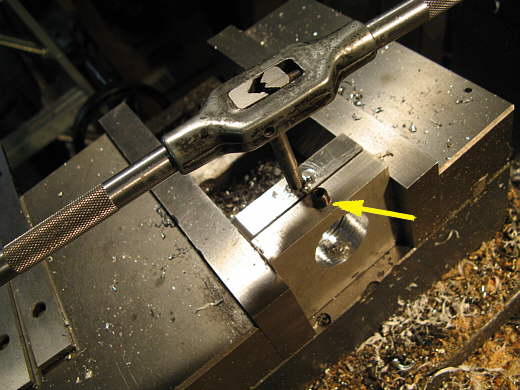
I drilled the ends of these brackets and tapped them for 1/4 inch set screws that will hold the ladder rung in.
...............
Here a rung and the brackets have been clamped (arrows) to the uprights and leveled.
...............
Using the TIG welder, remember this is aluminum, I tacked the brackets on the uprights. I wanted to space these away from the boat so that when you stepped on them there was clearance between the rung and the boat for the toe of your foot. The rung is directly above the top one on the ladder.
...............
Well one afternoon and early evening's work. Time to eat dinner and post this mess. Back at it tomorrow, Sum