................Our MacGregor Index Page.......... Mac 26S Inside Mods Index Page
............................................
Previous
Page...............................
Next
Page If There Is One
..................
...........--- Original Double Doodie Bag Head Part III ---
...............
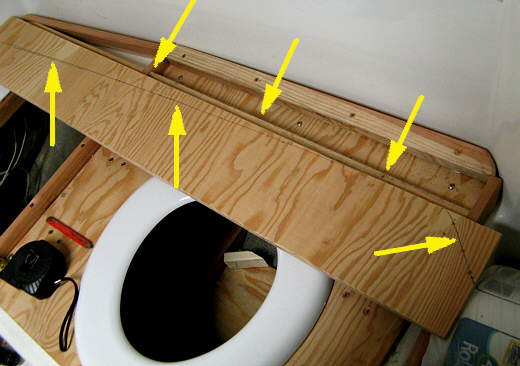
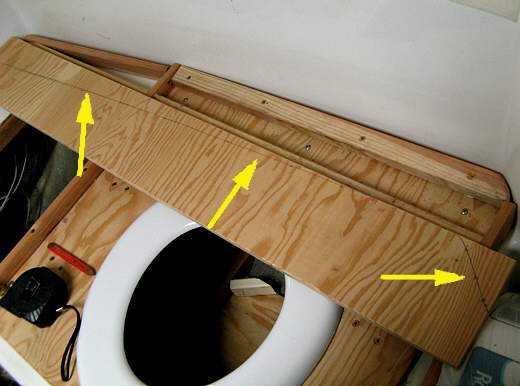
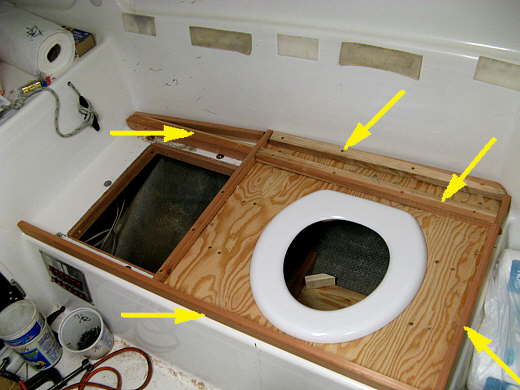
Here the top arrows point to some redwood pieces that will support a little deck in that area. As you can see the back plywood I made wouldn't of been necessary as you won't see it. The bottom left and right arrows point to pieces that will be screwed to the bottom of the decking that will cover the toilet and the storage area to the left that the seat cushion will sit on.
...............
Here I'm getting ready to cut out the back decking that will go up against the hull. In case someone in unsure on how to cut a piece to an irregular shaped area like this I'll try and show how I made the cut line (bottom 3 arrows). First I'll cut a piece of plywood longer and wider than what I'll need. The top three arrows point to the bottom support which is parallel to the front of the seat area. I'll move the plywood that I'm trying to mark up to those 3 arrows. Now the front and rear edges of that plywood will be parallel to the front of the seat.
...............
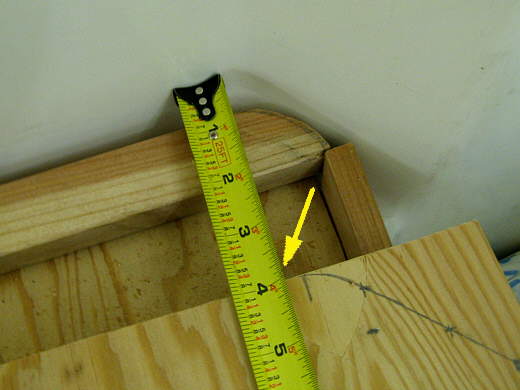
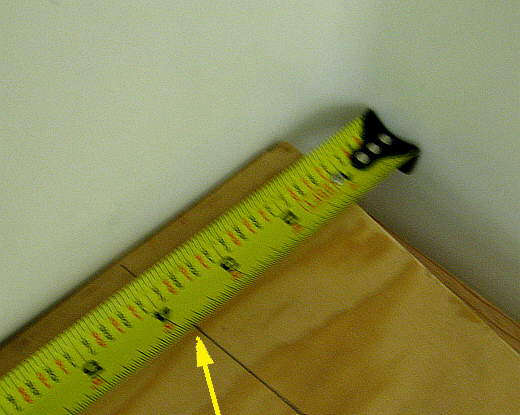
The hull area by the tape measure is the furthest from the plywood I'm marking and I'll start there. It looks like it is 4 inches away due to the camera angle, but it is 3 7/8 inches from the wall to the plywood. This point on the plywood that is straight across form the hull will be the widest part of the piece we will cut. Next.....
...............
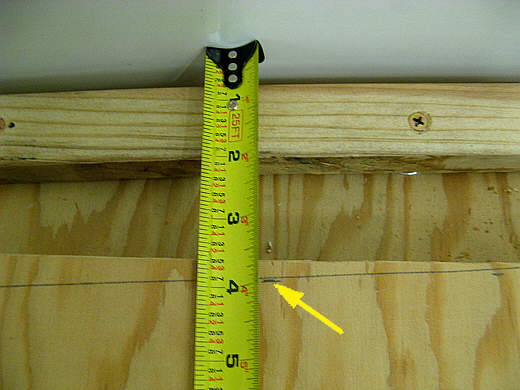
... I move down the hull about 6 inches or so and keeping the tape measure perpendicular to the plywood I put a mark at 3 7/8 inches on the plywood (the small mark by the arrow). Then....
...............
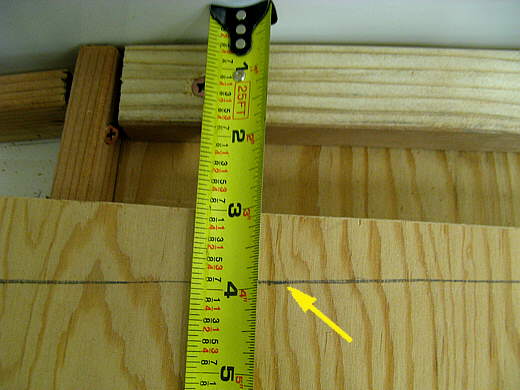
... I move down the hull about another 6 inches or so and put another mark on the plywood (arrow). Then ........
...............
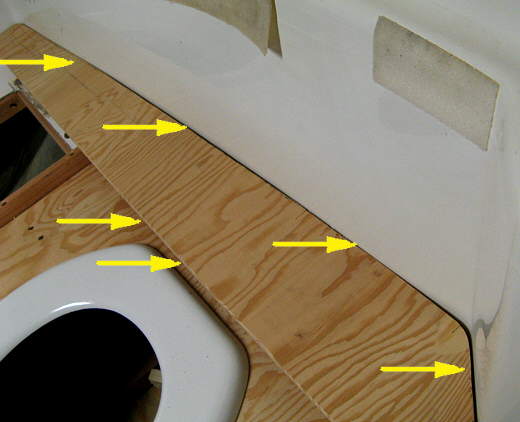
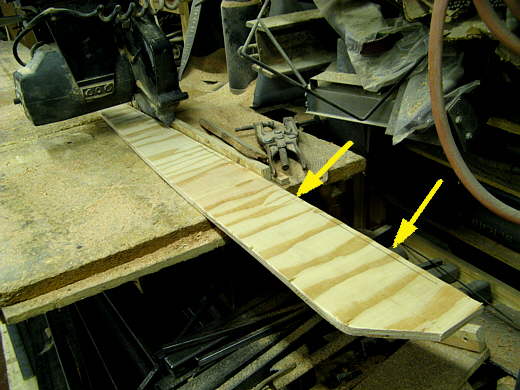
... I move continue down the hull about 6 inches at a time putting marks on the plywood 3 7/8 inches in until I place my last mark at the end of the plywood (sorry for the blurred picture). For you it will not be 3 7/8 inches, but use what ever the measurement is for the first step.
...............
I then went back to the other end of the plywood and did the same thing down the part of the hull that is tapering in to the right of the tape. I did it here closer together and you can see the marks on the line to the right of the tape. Be sure and keep the tape at 90 deg. to the edge of the plywood.
...............
After you have all of your marks connect them together with a continuous line like one that is shown by the arrows. Now you have a cut line that is close not exact, but close to the shape of the side of the boat. Cut the piece out along your line.
...............
Now fit the piece to the wall. You will find that you are close, but if you aren't like you want it go to the next step. You can see that top arrows point to places where the plywood either touches the hull or there is a gap. Also note that the plywood overhangs into the toilet area as we intentionally made it too wide. That is fine at this point.
...............
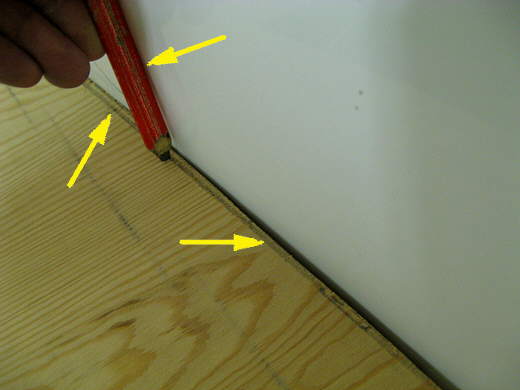
With the plywood pushed against the hull and not moving it you need to scribe a line along it. Here I'm using a carpenter's pencil and holding it flush with the wall (top right arrow) and dragging it along the plywood. It is leaving a line that is parallel to the hull and follows all the irregularities in it. You can see there is less plywood between the line where the gaps are and more where it touches the line. This is what you want. Not cut to either the inside or outside of this line, but be consistent. Put the piece back in place and if you don't like it scribe it again until you do like it. Here I scribed it once and after cutting to the line I was happy.
...............
Once I was happy I ripped the other side of the plywood to get the width I wanted so that the board would sit on the support piece under it where I wanted it. This edge should still be parallel to the front of the seat.
...............
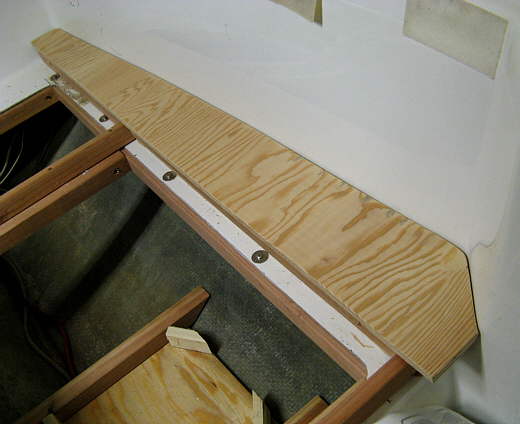
Here the piece is in place and I'm happy with it. The only time it will show is when the cushion is off and someone is using the toilet.
...............
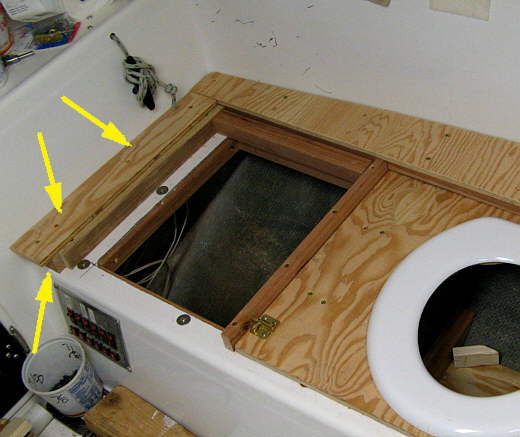
Next I framed in the area to the left of the left storage compartment where there will be another small deck. The other arrows point to the pieces that will be on the bottom side of the top pieces yet to come.
...............
Here the small left deck is in place. This wall also is not perpendicular to the front, so this piece is wider at one end than the other. The bottom left arrow points to the front facing piece.
...............
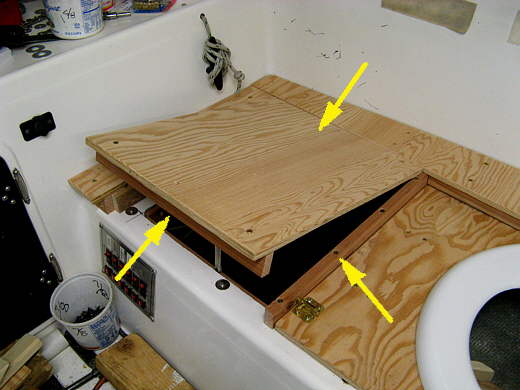
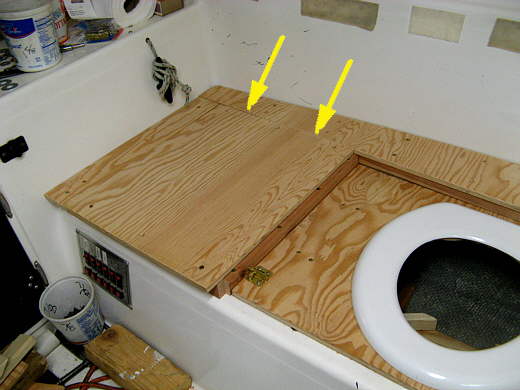
Here the left top piece has been cut and is in place with a front facing/support piece (left arrow). The top arrow points to where the hinges will go that I have on order at the time I wrote this. The bottom right arrow points to a support piece that the top piece rest on and that also the next piece will rest on.
...............
The arrows point to where the hinges will go.
...............
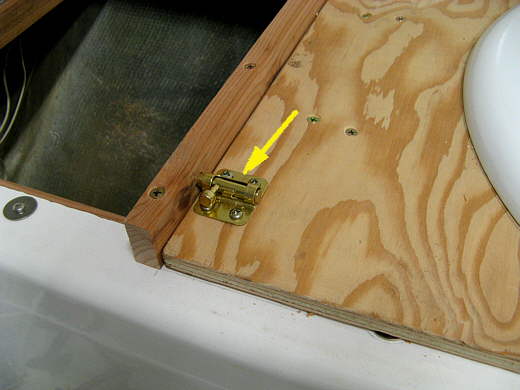
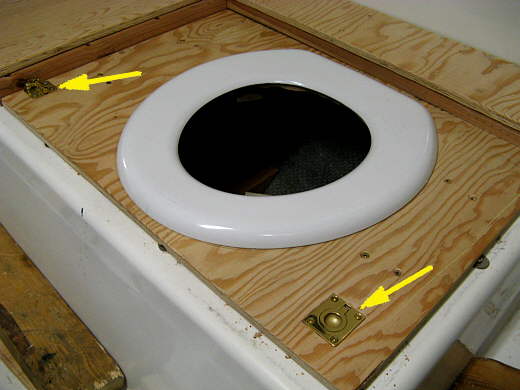
I also put this latch in so that the toilet lid cannot open. This will mean that the toilet bucket will be locked into place under the seat. To take the lid off the bucket to use the toilet one will open this latch and lift this deck up and remove the bucket lid and set it back down and use it.
...............
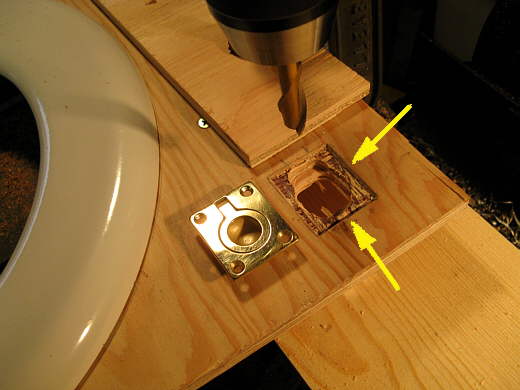
To lift this section up I installed this finger pull. I turned it upside down and squared it up where I wanted it and marked with a pencil around it. Then I cut the square area down one ply layer with a chisel. I first chiseled around the perimeter and gouged out the one layer of the plywood so that the pull would be recessed flat with the surrounding area. Then using the mill I milled out a larger hole for the center section of the pull to fit into.
...............
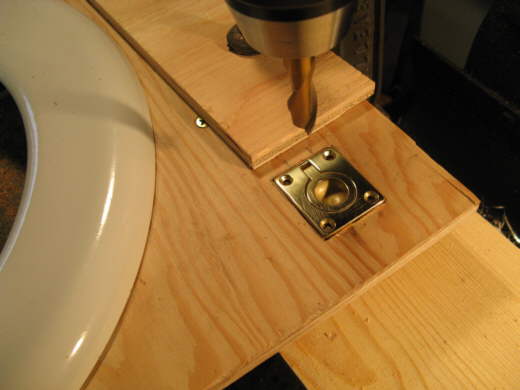
Here I'm test fitting the pull while I still have it mounted on the mill.
...............
The arrows point to the latch on one side and the pull on the other. There are no hinges on this piece, but it goes in about 1/8 of an inch under the rear platform, so it can't lift back there and that acts like a hinge to locate it when you lift it up. It can't move side to side or fore/aft due to the blocking under the plywood.
...............
Here you can see the finger pull being used and you can see how the back edge stays in that recessed area under the rear platform. If you want to completely remove this section to pull the bucket or Double Doddie or Wag Bag just pull it forward a little out of the recess and it lifts right out.
...............
Here we are with just one last piece to go.
...............
I cut that piece and screwed it to the front and side support/facing pieces that I showed you up at the beginning of this page. Hinges will go where the arrows are.
...............
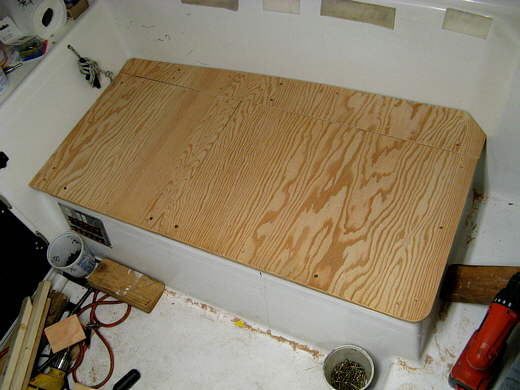
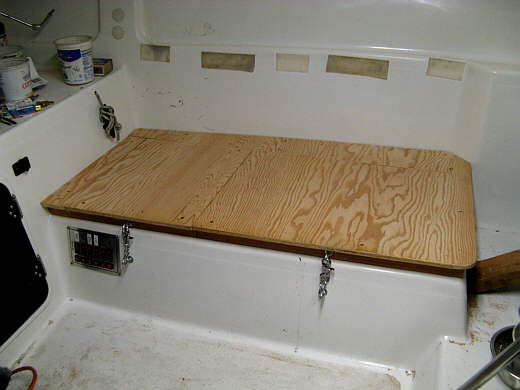
The finished seat support. I cut all of these pieces from one larger piece and cut them in sequence so that the grain pretty much lines up across the whole area. The beginning piece was a few inches wider and longer than needed. It is 1/2 inch marine plywood. Also note that the bottom right corner has been rounded.
...............
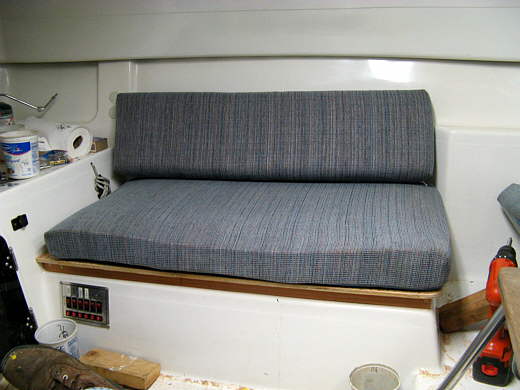
With the cushions in place. The seat is about 1 7/8 inches higher than the original seat platform. This moved it up a little higher where the centerboard line is tied off (arrow). I could move that cleat up a little, but think I will live with it for now and maybe try and run that line aft into the cockpit like Bob and some others have done.
...............
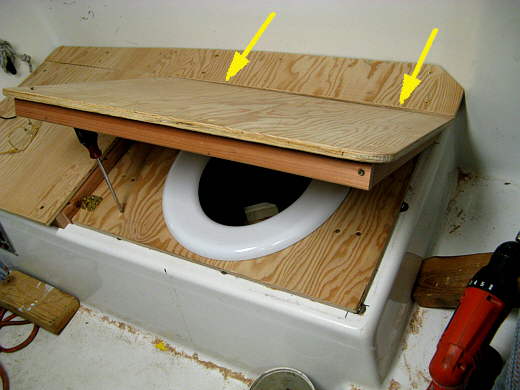
I shot this from a lower angle so you could see the edge of the plywood and the facing/support under it.
...............
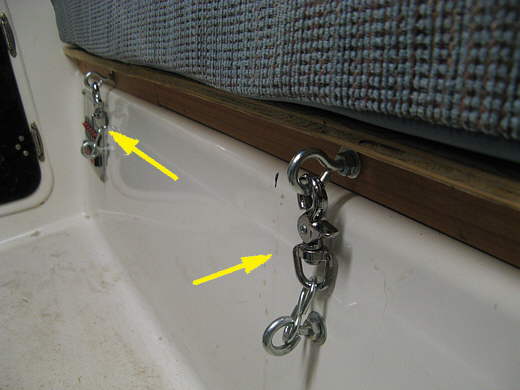
Even thought the toilet seat and it's platform can't move in rough seas I didn't want the part over the storage compartment or over the toilet set to be able to flap open so I added these snap fasteners to each to secure them The picture is a close-up and makes them appear larger than they are. To get to the toilet you remove the cushion and unsnap the right one and hinge that area back against the hull and use the toilet.
...............
A shot showing how the latches secure both areas. Remember the hinges are still not installed at this point for the two hatches.
...............
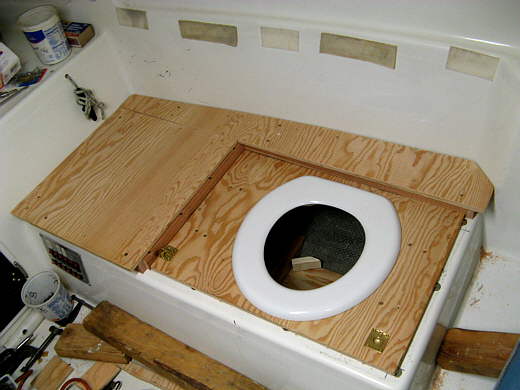
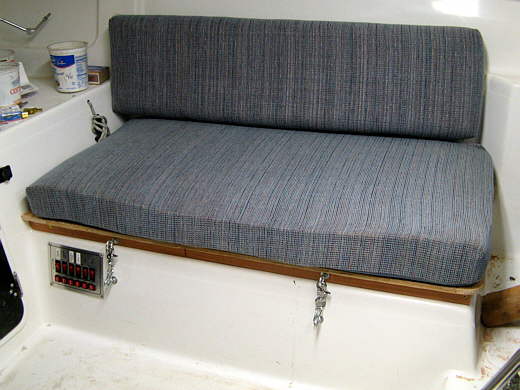
A final shot.
On the next page I'll show all of this after it has been stained and then had clear urethane applied over the stain and hopefully the hinges if they show up.
.................................................................................. Next Page If There Is One