..................
.........--- Installing Common Sense Fasteners ---
The following is a review of how we are installing common sense fasteners on our fabric projects. One option is a punch that Sailrite sells that punches out the center hole and also the 4 prong holes. I thought I would try something else and so far we have been happy with the results.
.......
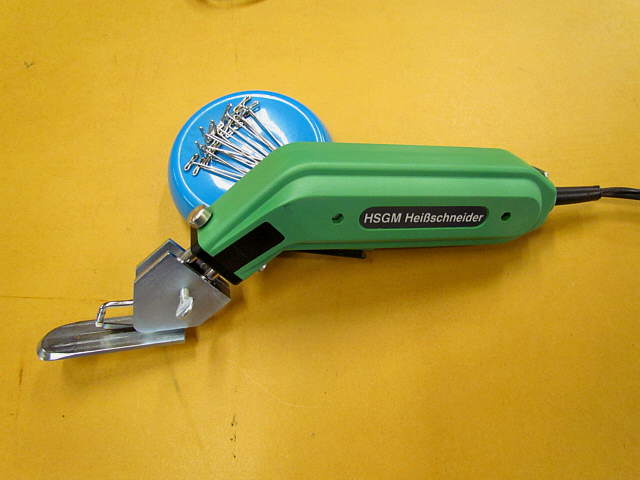
We had been using a modified soldering iron to cut our Sunbrella instead of scissors as when you cut it with scissors it will unravel to some degree and when cutting with a hot knife it melts the edges as the cut is made and no more raveling. Well the solder gun works, but is slow. Finally we bought the above hot knife and then added the foot from Sailrite. They also sell the hot knife and foot. The foot keeps the hot blade off of your work table and works well but mostly on straight or slightly curved cuts. You can change to a different blade for work that requires cuts of a sharper radius, but we still use the....
.......
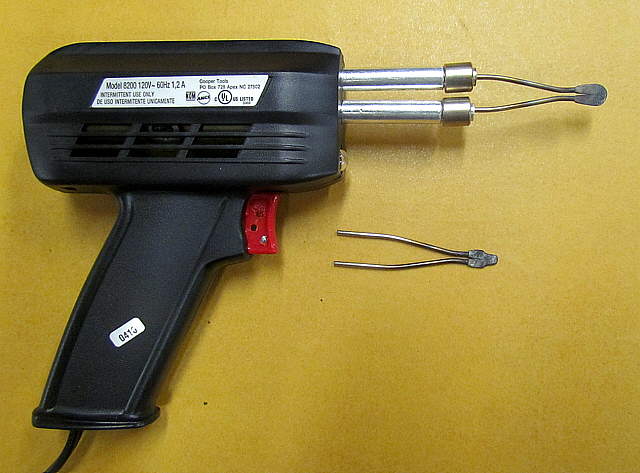
...soldering gun for those. Above you can see the gun with a blade that you can order for these guns that works well and is what we cut a lot of Sunbrella with before getting the other hot knife. If you can't afford the other knife I'd still recommend the solder gun with the above tip. The lower tip is one I modified and I'll talk about it in a minute.
.......
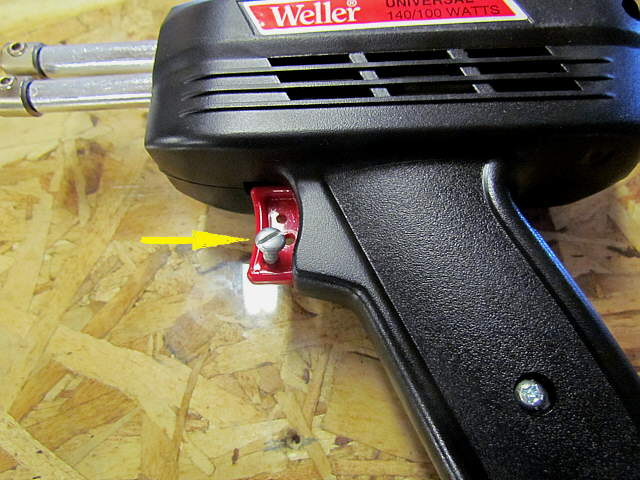
One thing I didn't like about the soldering gun is that if you pull the trigger all the way in it is on the lower heat setting and to get the high setting you have to just partially pull the trigger and that is tiring on a long cut. I drilled the trigger and put in a screw so that now you pull the trigger and it won't go past the high setting to the lower one. You can see I drilled a couple holes before I found the right distance in. This makes it much easier to use.
.......
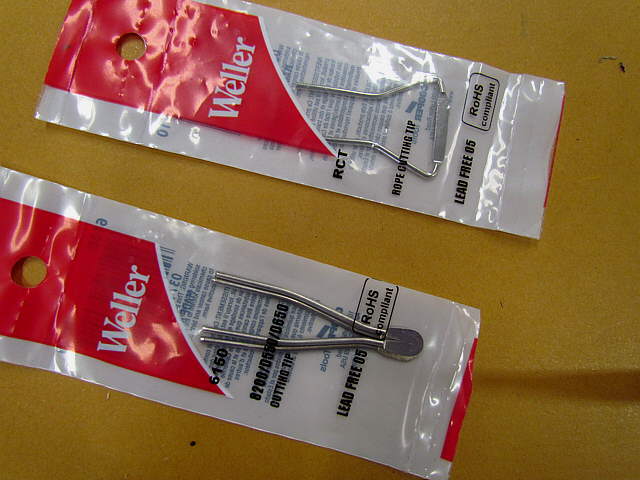
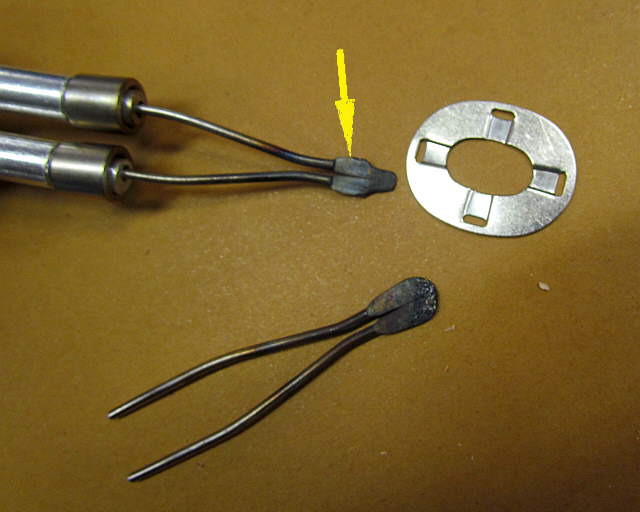
Above are optional tips you can buy for the solder gun and the bottom one is the one we were using before buying the newer hot knife.
.......
We have a heavy piece of rather thick scrap glass that we do all of our cutting with the solder gun on. The corners, arrows, have been taped so that material doesn't snag on them. If you are cutting long straight pieces try holding the gun in one place on the glass and pulling the material through it. It will go faster as the tip stays hotter since it has heated that one section of glass. You can't cut near as fast as with the expensive heat knife, but we made a lot of projects using the gun. It is a little slower than cutting with the scissors, but the edges, even if hemmed, stay much nicer, free of unraveling.
Ok now on how to use the solder gun to put in common sense fasteners.
.......
One of the rounded tips was ground to a new point on a grinding wheel so that...
.......
... it was about the same width as the slots needed in the material for the fastener. I used a washer as a guide to get the tip the right width.
.......
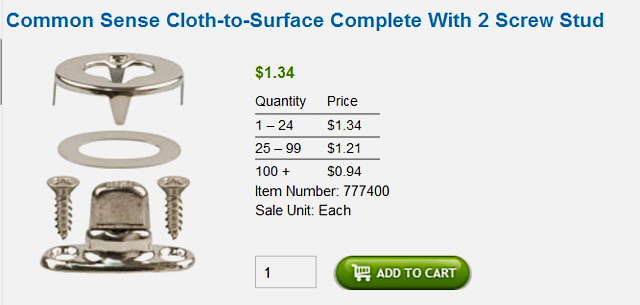
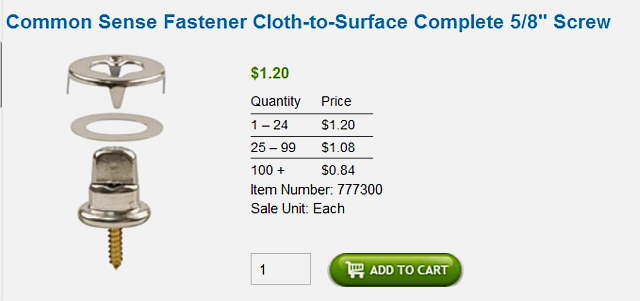
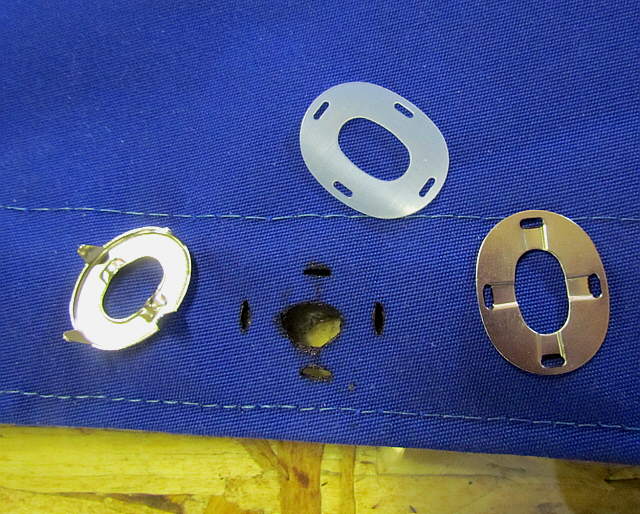
Above is on option on a common sense fastener that you can order from Sailrite. The top part goes into the fabric and the bottom part screws to the deck.
.......
Above is a second version where the bottom also screws to the deck with the top being in the fabric. For our purpose we are concerned how to attach the top part to the fabric.
.......
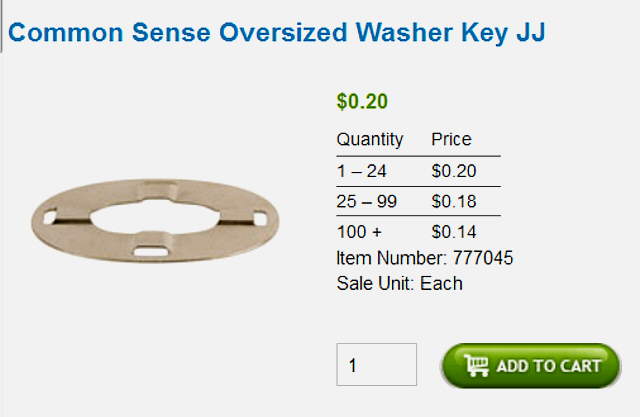
We also ordered the oversize washers above to spread the load more on the fabric, also from Sailrite. They go on the bottom side of the fabric.
.......
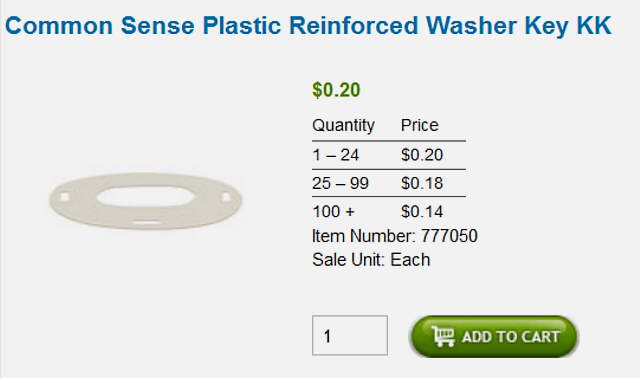
You can also order the above plastic washers to go on the top side of the fabric to protect it some from the bottom side of the metal piece there. Below you will see how all of this goes together.
.......
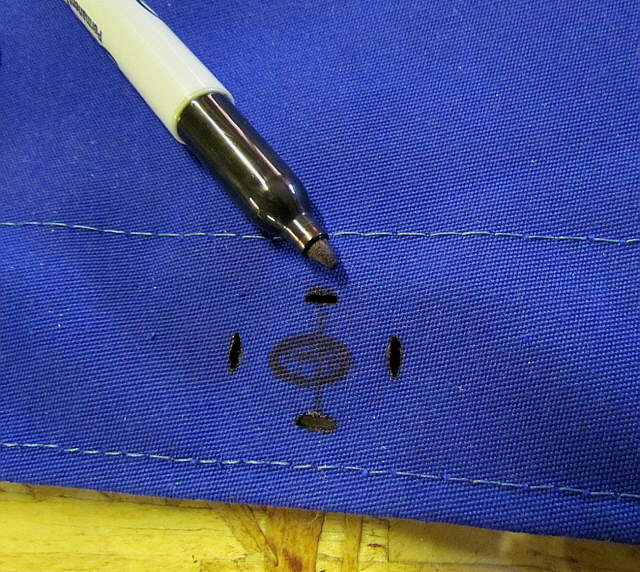
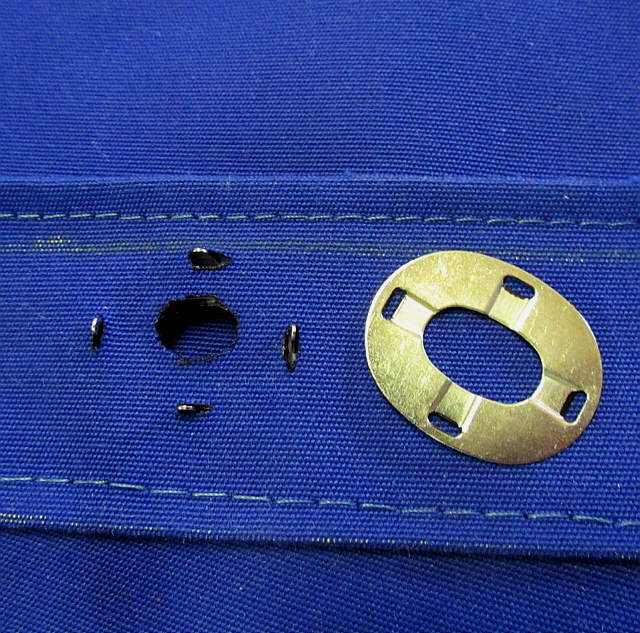
Start by determining where you want the fastener in the fabric. Hold the washer there and mark the 4 small slots and also the center hole.
.......
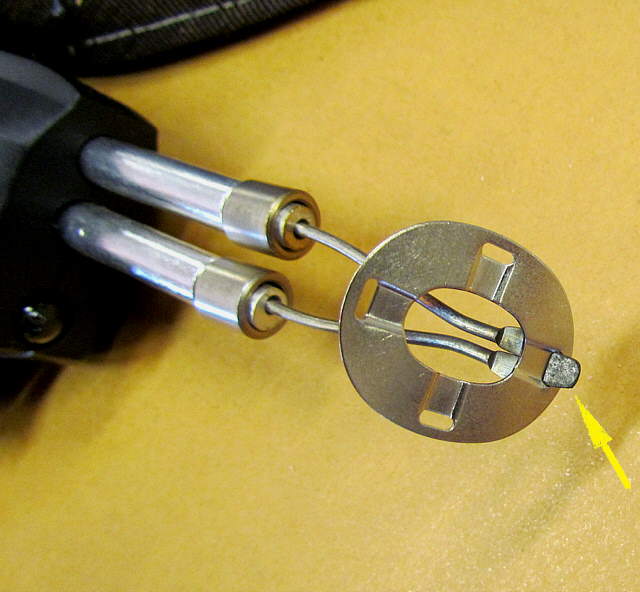
Then take the soldering gun and slit the fabric where you marked the 4 slots. Use the same tip on the gun and cut out the center. This actually goes real easy and you will find that you have good control, but practice on some scrap a time or two.
.......
Above the center has been cut out. The plastic washer, top, goes under the fastener part on the left and then that assembly is ....
.......
.... pushed through the cloth and the metal washer part is put on the 4 prongs. Notice that the metal washer has recesses on one side for the prongs. Don't put it on upside down.
.......
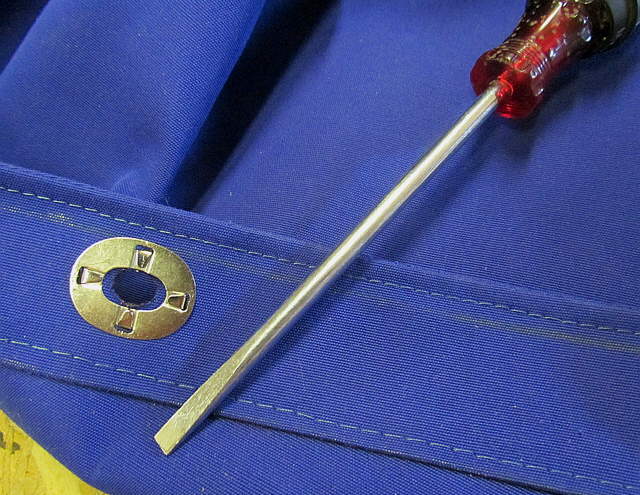
You can use some needle nose pliers to start the bend on the prongs and then ...
.......
... finish bending them down with the screwdriver or after doing it a couple times you can skip the pliers and just use the screwdriver.
.......
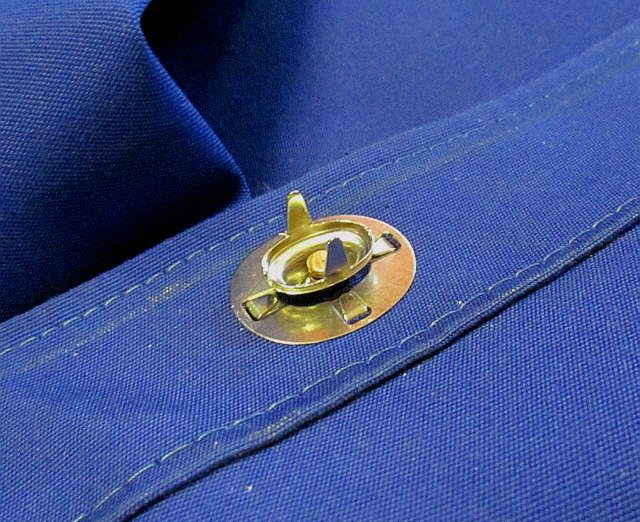
Here a fastener has been pushed through the assembly just for a check. The above fastener can be put in another piece of fabric or you can use the ones shown earlier that fasten to the deck.
.......
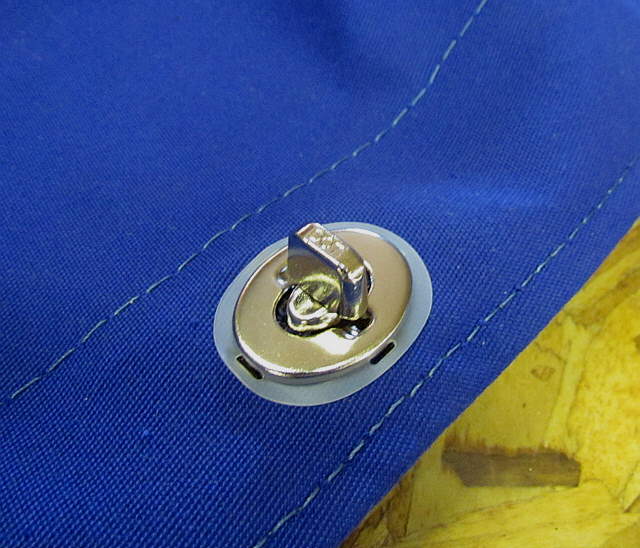
A view of a fastener from above. We like these a lot better than snaps as they go on and off very easily and you aren't pulling on the material to unsnap the fabric from the surface.
.......
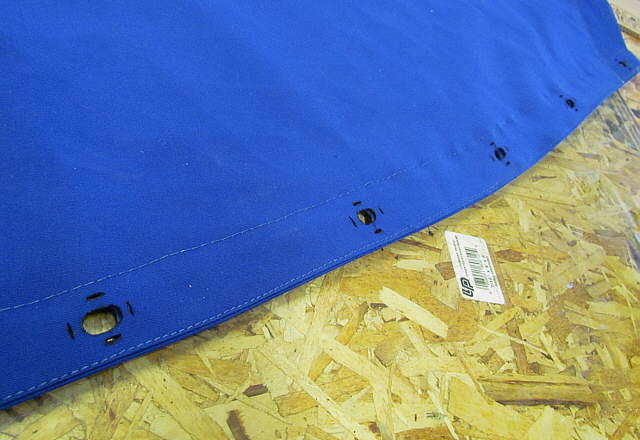
Mark a number of holes/slots and cut them out very quickly with the solder gun. One think I like about this is that the heat from the gun sears the cloth and kind of seals it like cauterizing a wound and there is no unraveling.
.......
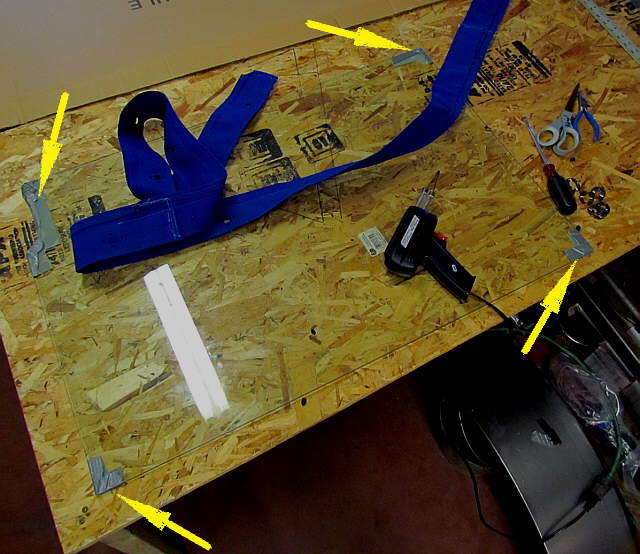
Above is the bottom of one side of the dodger we were making to replace the worn-out one on the Endeavour.
.......
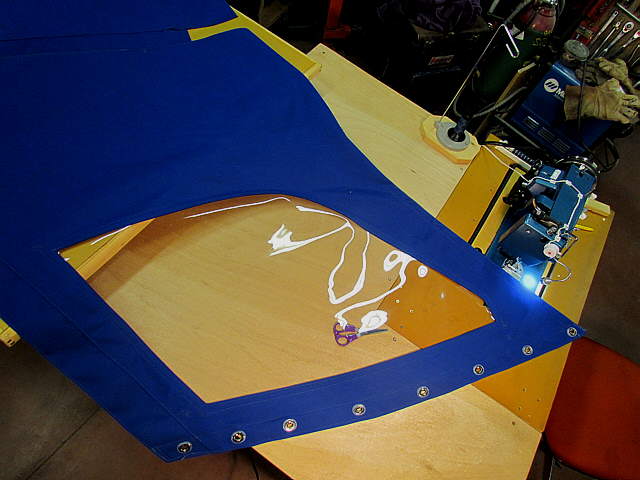
Detail of the bottom and one side of the front window for the dodger. The old dodger had snaps and a number of them had tore out of the material with age.
.......
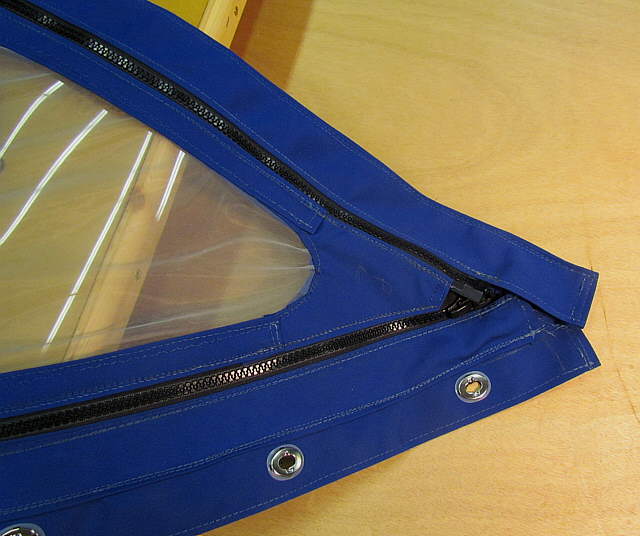
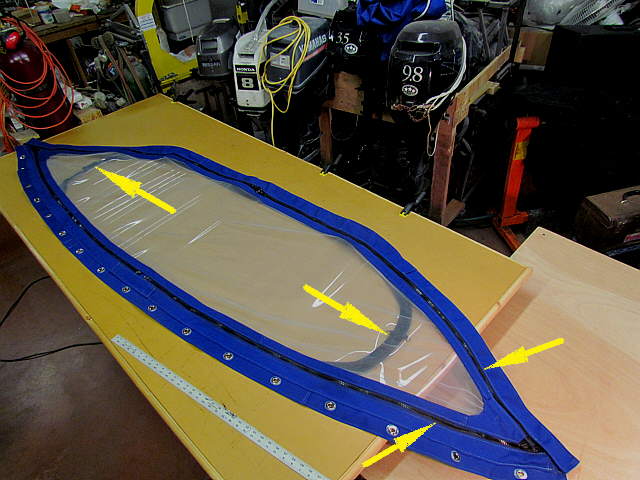
Above is the whole front window assembly that zips onto the front of the dodger and is held at the bottom to the deck with the common sense fasteners. On the old one you only had the option of removing this whole piece. Now this piece zips onto the front of the dodger with a zipper out of view under the top flap. There is now a screen over the entire front that can be removed with top and bottom zippers on each side. The two right arrows show the port side zippers for the screen.
The middle arrows point to the zipper that circles around most of the front window and it can be un-zipped and laid back for fresh air. There are 4 zipper slides on it so you can open it on either side or drop the whole window down inside the dodger. I'll have pictures of that up where the dodger build is documented.
So now the whole front can be removed or just the screen can be removed by unzipping its 4 zippers or you can drop it by just unzipping the top two zippers. The window can be unzipped also with or without the screen in place.