...............................--- Mounting Solar Panels At The Boat ---
.............................................................................................--- Part I ---
Towards the end of our time on the boat in the boatyard in 2012 after finishing the interior mods the time finally came to try and mount the solar panel framework. Believe me I had some anxiety about this both at home and after arriving at the boat.
..............
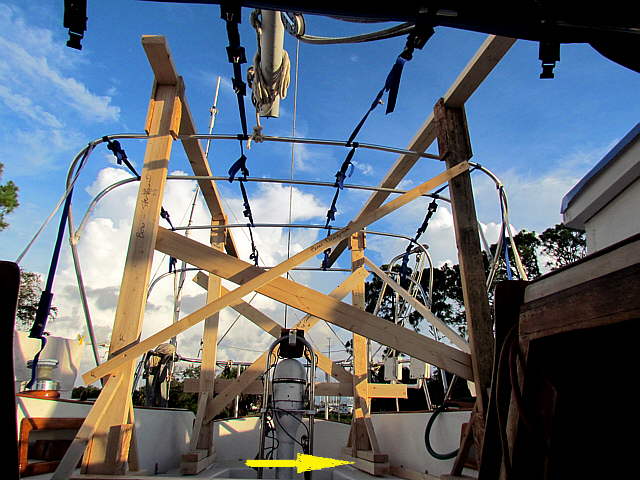
The wooden platform I'd made 2200 miles away went into place without a hitch with the exception that I added some pieces under the foot to raise it some, arrow.
..............
Here you can see the additional 2 X 4 spacers that were added.
..............
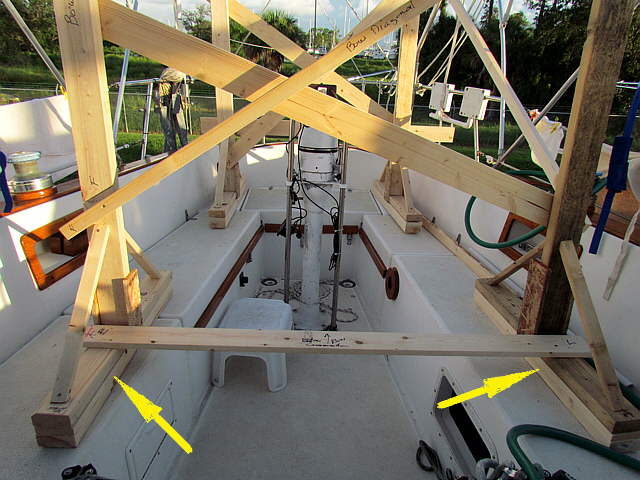
They raise the woodwork to a distance that I was happy with over the bimini frame. The straps we made for the frame allowed us to position the bows in exactly the same position that they are on when the Bimini is in place.
..............
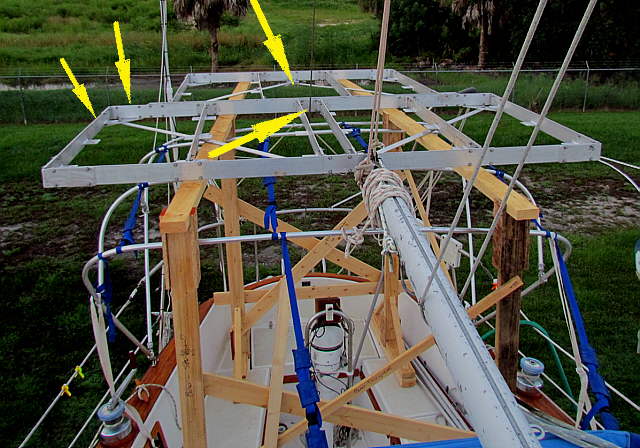
Here is a top view. I had been hoping that the leading edge might of fit a little under the boom, but it was too high so you will see below that the frame is entirely behind the boom which is probably good to keep the boom from shading the panels. The wood supports turned out to be invaluable, but sure were a pain to have to move around when making the uprights to hold the framework for the panels.
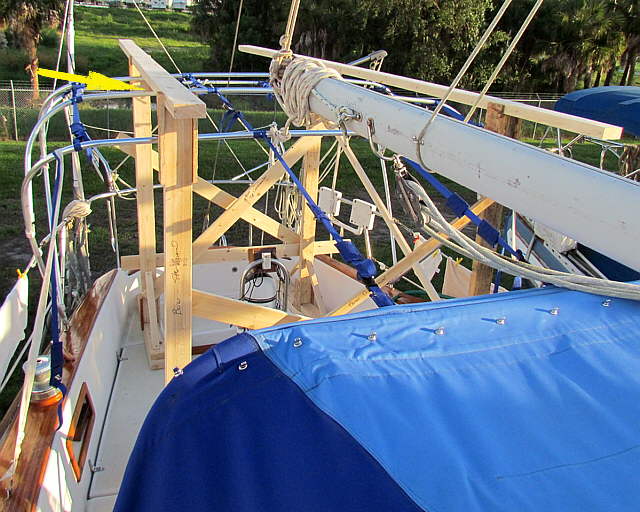
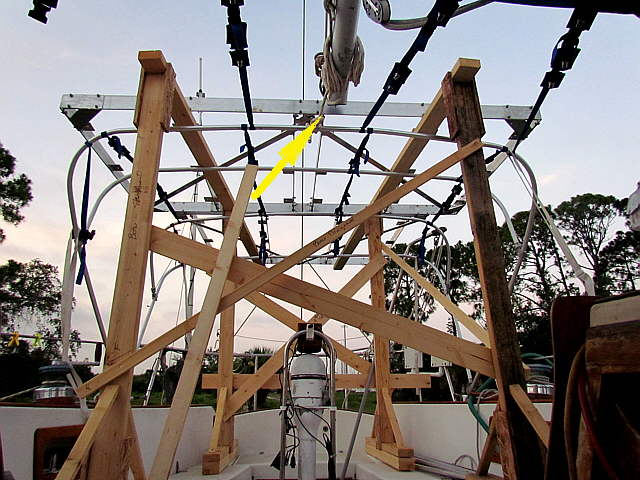
..............Sorry but the next picture I have is the frame in place and you can see how the aft end of the boom clears it, arrow.
The frame was bolted into place one piece at a time as I didn't think Ruth and I could get either section of it from the ground up onto the boat and on top of the wood support structure. It went pretty fast taking a couple hours, but there are tons of 1/4 inch bolts used. She would put some anti-seize on them and hand them to me with flat washers, lock washers and nuts and I'd put them in the holes (well over 100) piece by piece.
I was able to reach everything without too much trouble even the ones hanging off over the stern. I was glad that I had put indexing on all of the pieces when I had taken it apart 4 months earlier at home.
With a couple other guys helping the frame probably could of been bolted together into the two main sections on the ground and brought up onto the boat. That would of been nice.
..............
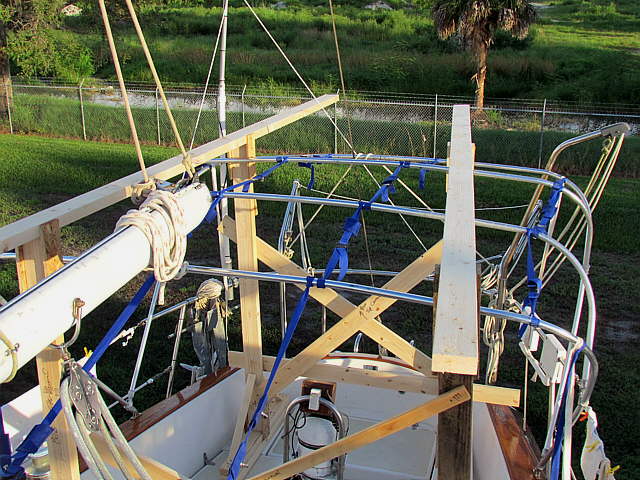
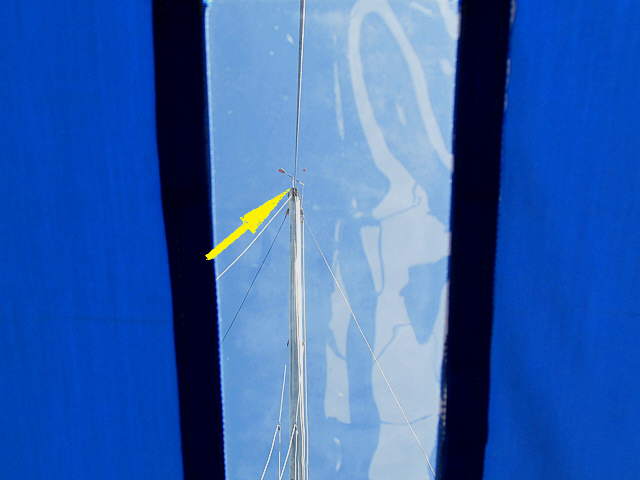
The frame ended up about a foot further back than what I had envisioned at home. There I thought the backstay, bottom middle arrow, would of come up through the frame in the rear section, top middle arrow. Instead it came up through the slot where you look up at the windex when the bimini is up (see next picture). Since the backstay is in that location that does leave that back center space open for another panel if we so desire. I like that space open from the standpoint that I can stand on the transom and reach forward to .....
..............
..... control the ....
..............
...flap that covers the windex window when not in use.
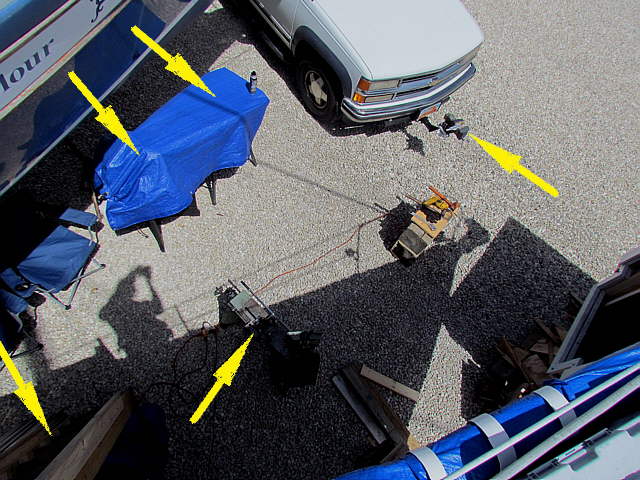
Before I finish the install I thought I throw in some pictures of the work area at the boatyard.
..............
The picture is looking down from the port side of the bow with the ladder I made in the lower left side of the picture. The arrow to the right of the ladder arrow points at the HF bandsaw. The top two arrows on the left point to a HF compound miter saw and a sears table saw that are side by side under the tarp. The top right arrow points to my vise from home mounted to a receiver on the front of the Suburban.
..............
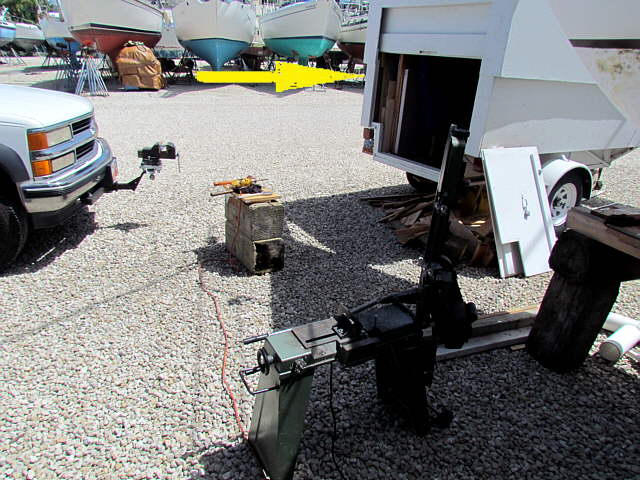
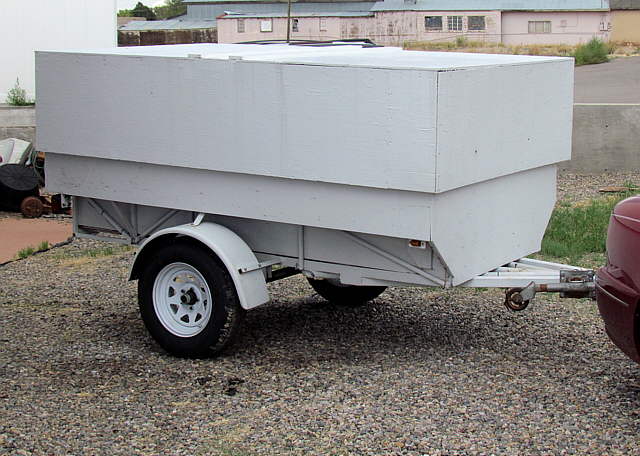
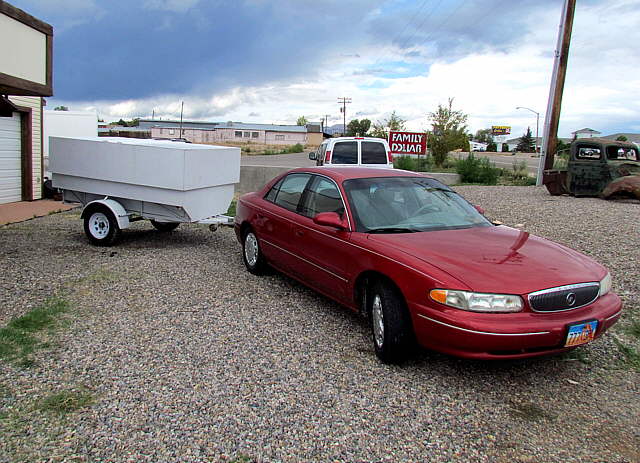
A ground view showing the trailer I made (or remade from an older trailer I first made in the 70's), more on it below.
..............
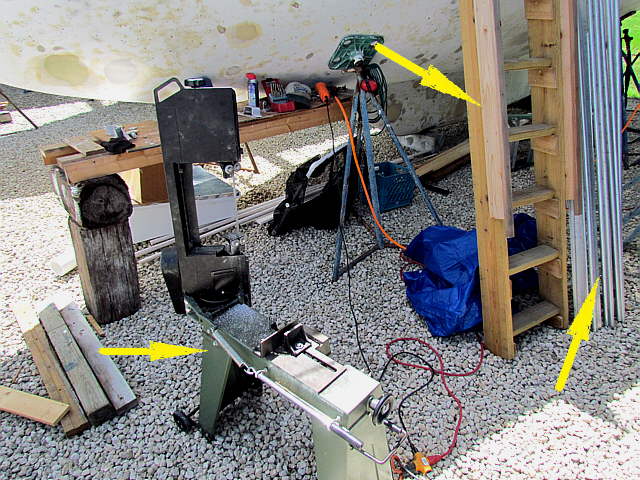
The bandsaw, left arrow, and the aluminum for the solar install uprights, right arrow and the ladder I made between them. Not sure why the picture shows the ladder looking like it is straight up and down, but it isn't.
..............
I'd made a trailer back in the 70's out of a Datsun independent rear-end that I got for nothing and some regular plumbing pipe and some wood. I had no money at the time and had to take a trip so I used what I had. I used it over the years but the rear-end was not a good deal as I had it mounted solid without the coil springs and I always feared the water pipes would fatigue and fail.
So before the trip to Florida I pulled it in the shop and cut the rear-end from under it and put a short 3500 lb. axle with 2000 lb. springs in its place. The axle has brake pads on it so it would be easy to add brakes if I ever wanted to. I made a new longer square tubing tongue (you can see the old pipe one in the center of it). This makes it much easier to back and is a lot stronger.
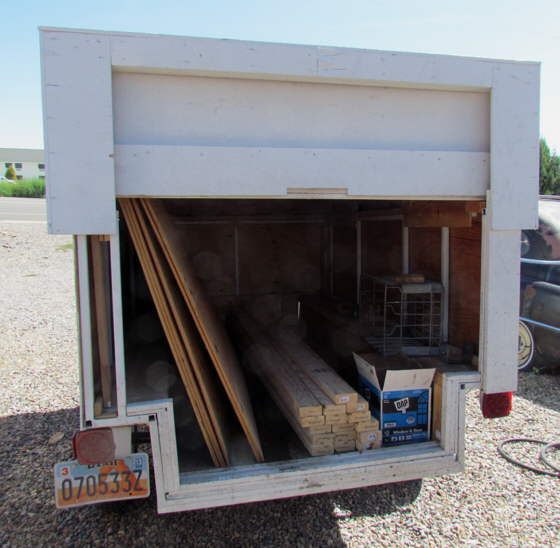
I also added to the frame at the back so that I could easily store 8 foot long plywood inside.
..............
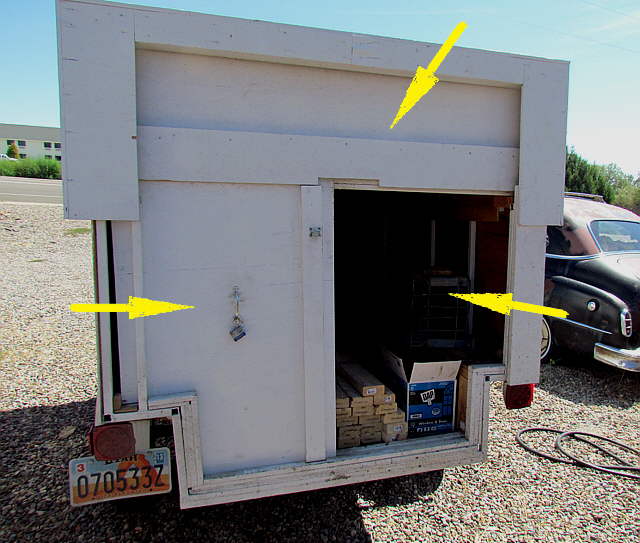
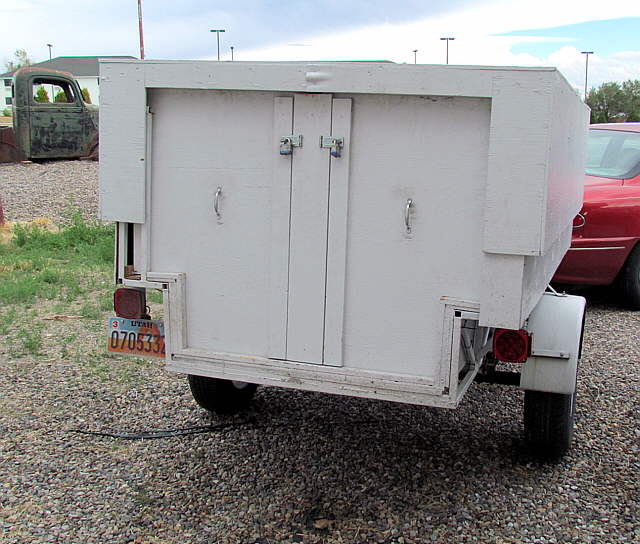
It had a wood box on it that was in bad shape so I made a new larger one that has a top that telescopes down over the lower sides. There are two door like pieces in the back that slide in with a third narrow one, not show, that goes between them so that the back locks up. The bottom doors slide up also into the top back piece that....
..............
.... can stay in place or ....
..............
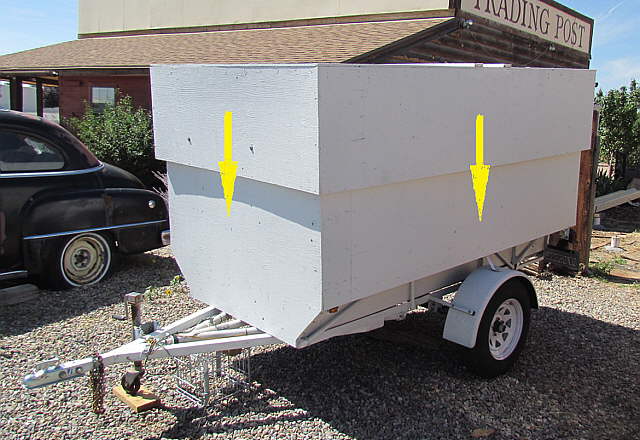
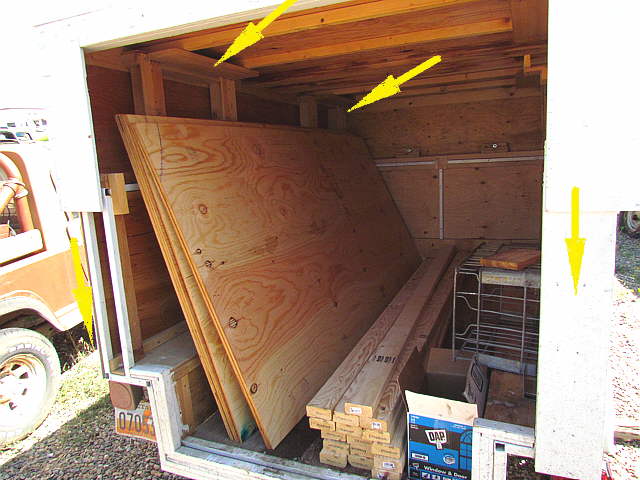
....be removed easily. The arrow inside the trailer points to one of 4 supports that slide into place with the top up. I have a transmission jack that is used to then raise the top after which you can remove the 4 supports and lower the top down, side arrows. This reduces the height a lot if we don't need the extra height and should help fuel mileage some.
..............
With the top down (above).....
..............
..only the two doors and middle piece are used to close the back off.
..............
The trailer tows like a dream with either the Suburban or Buick and you can get a lot in there. Going down to Florida with the top in the 'up mode' it was filled to the top with plywood, tools, canvas projects and all kinds of other stuff and somehow was fill coming back home.
So an old trailer lives on in a new life.
..............
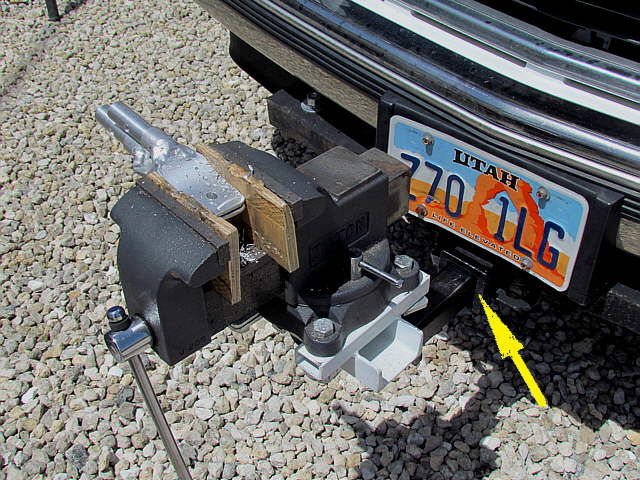
Above is a close up of my vise mount. I'd built the front hitch/receiver for the Suburban to help move the Mac around on her trailer at home. I took a spare hitch and removed the ball from it and made the mount for the vise that bolts to it and the whole deal slides into the receiver. It works great and you can see the next step for the solar panel framework in the jaws of the vise so let's continue on.....