.................................................Sumner's Home Page.......
......................................................Car 2727
..............bb......
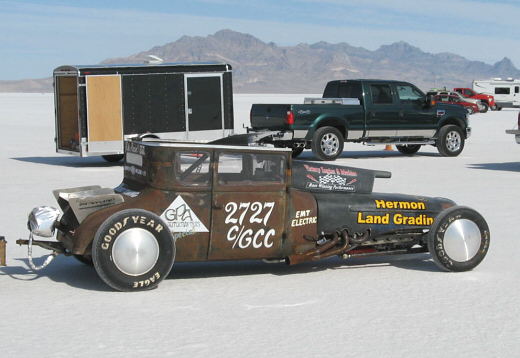
The last couple weeks I've gone over to Cortez, Colorado twice and stayed a couple days each time to work on this new comp coupe that is being built by Phil Alexander of CarWorks along with Bill and Jake that work for him. This will be a "fun" car that has no chance at the record in C/GCC, but will hopefully run at least 175 this trip to the salt. Phil and the guys build hot rods for a living and have done a nice job on this car.
...........bb.........
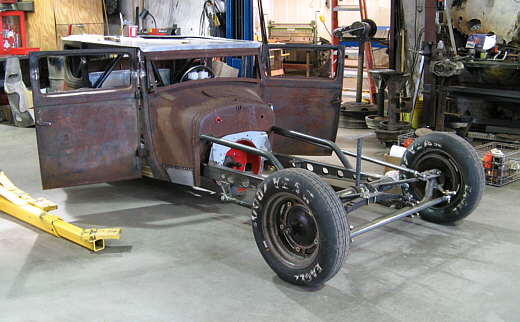
Phil wanted to use a '41 Ford truck hood for the front of the car. First we had it laying on the cowl, but that left the extended wheelbase front of the car sticking out. We pulled it forward and dropped it over the front axle and stayed with it there. Using the hood in this manner presented two problems. One was now there was a 20 inch gap from the hood back to the cowl and the second was that the hood was about 9 inches wider than the cowl on both sides.
...........bb.........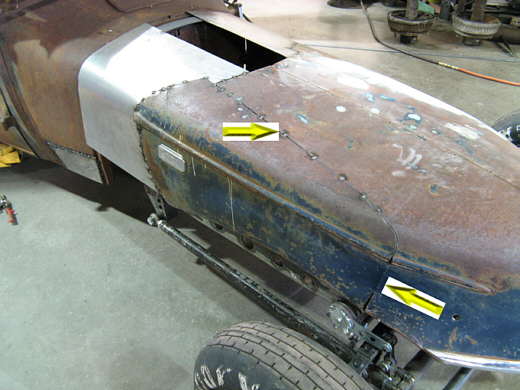
I solved the width problem first. I made a long cut on both sides of the hood (top left arrow) forward to and through the body line and another cut down at the bottom front of the hood below the right arrow. Then I bent the hood sides in at the vertical part that was still attached (right arrow). The bent in part of the hood overlapped the top of the hood and I marked the overlap and pulled it back out and cut the pie shaped piece out of the hood. I did this for both sides. I then bent it back in and tack welded it together. Now it was the right width for the cowl. Next I cut two pieces of 20 gauge steel and bent them on my leg to fill in the side gaps from the hood back to the cowl. Phil and I did this together.
..................b....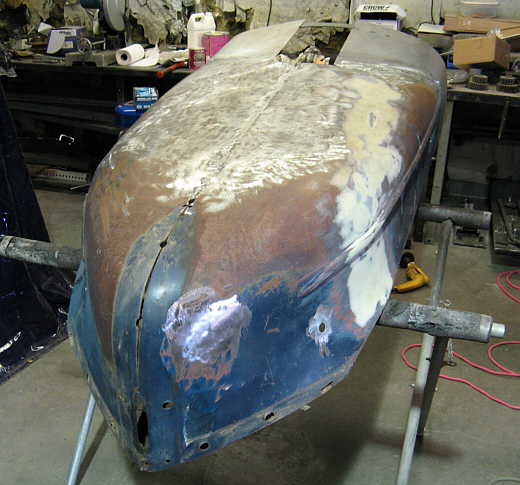
I welded the seam down the middle of the hood and got all the distortion out from the welding the best I could with a body hammer and dolly. Next I bondoed up the hood. This all took me a couple days to do on my first visit. I went back to Utah and then went back over the next week to build a scoop.
..................bb.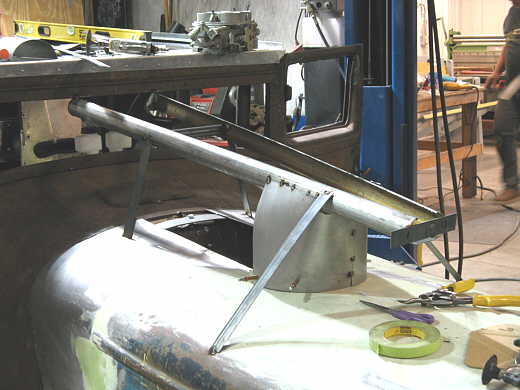
I used the formulas on my site to figure the inlet size I wanted for the scoop. I then took a 2 inch diameter piece of exhaust tubing and Phil cut it in half with the plasma cutter. I tacked it into place with a couple pieces of strap and 11 inches above the hood in accordance with the rules for a non-blown car. I also made a temporary piece around and under the front of it.
.................bb..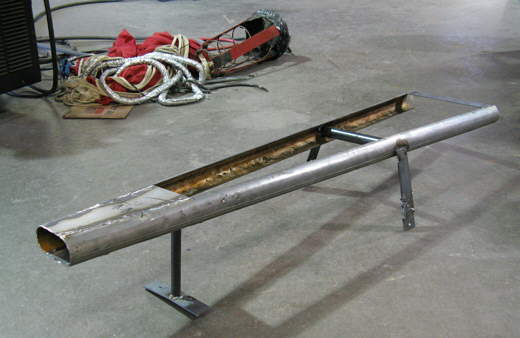
I enclosed it part way back and made permanent pieces to attach it to the hood. This will end up being the inner part of the scoop. When the engine is installed it will be finished and will be a plenum down to the carb.
...........bb........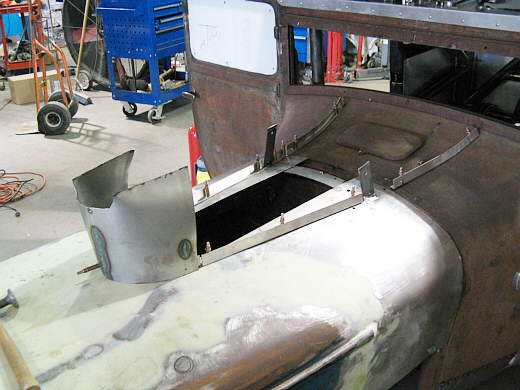
Next I started to build the scoop outer housing that will go around the piece in the last picture. I started with the bottom front of the enclosure I had already made.
...............bb....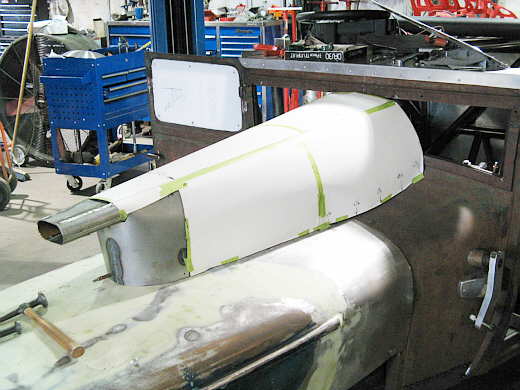
Using construction paper I made a pattern for the main part of the enclosure. The snout that is shown will end up being inside of the enclosure.
..................bb.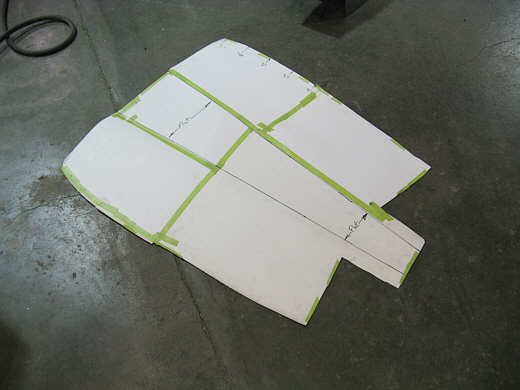
Here is the pattern laid out on the floor. I laid it out on a piece of 20 gauge sheet metal and we cut it out..
..............bb..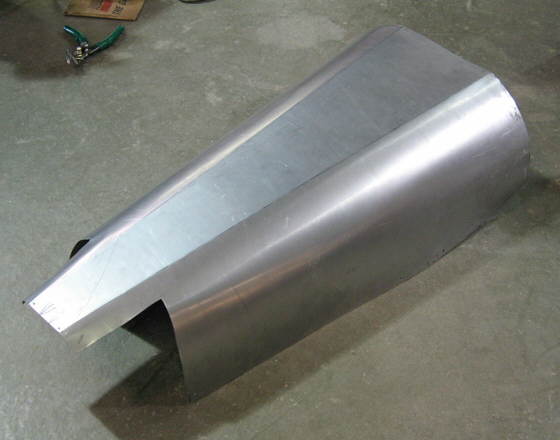
.......and took a brake and put two creases in it down the top. I then bent it over the inner scoop assembly that was made above and also over my leg to get the curve I wanted.
...........bb.....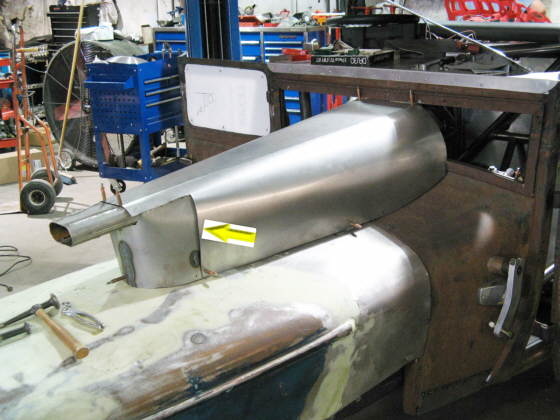
I put it over the inner scoop assembly (you only see the snout sticking out here) and held it on with clekos for the time being while I trimmed it for the final fit. Then I cut it and the piece around the bottom front and welded them together (area by the arrow).
.....................bb....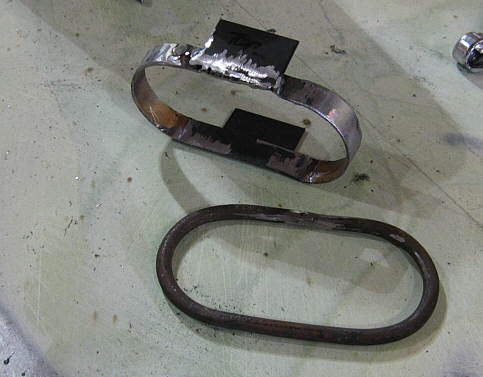
Now I need to cover the snout and make the outer enclosure connect to the snout. I cut the very end of the snout off (top piece in the picture). Then I took some round stock and bent it to the shape of the snout opening (bottom piece). The tabs on the top piece above and below align this short piece to the main snout that will take air to the plenum.
....................bb.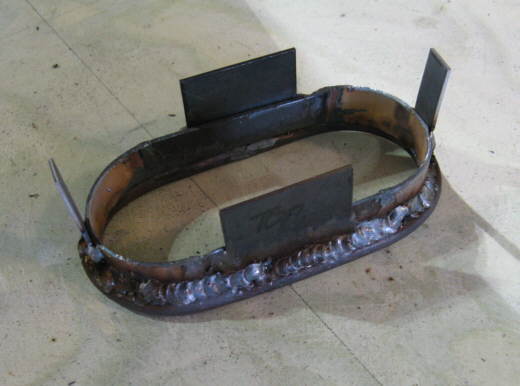
I welded the round stock to the snout end.
................bb..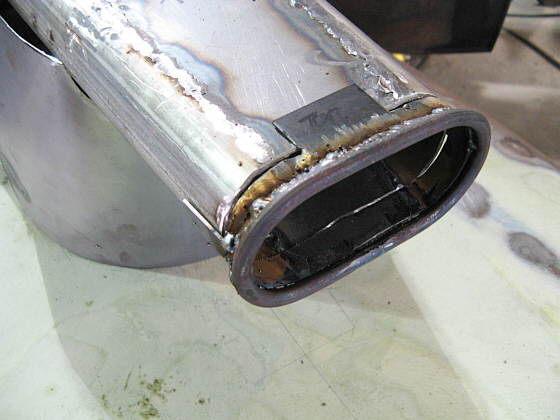
Here you can see how the above piece slides onto the end of the snout/plenum assembly and how the tabs locate it.
...........b.......b.....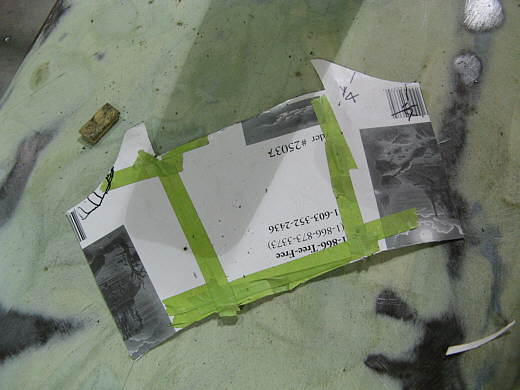
Next I made a pattern that would connect the above snout tip to the main enclosure and cut out some more 20 gauge.
...................bb....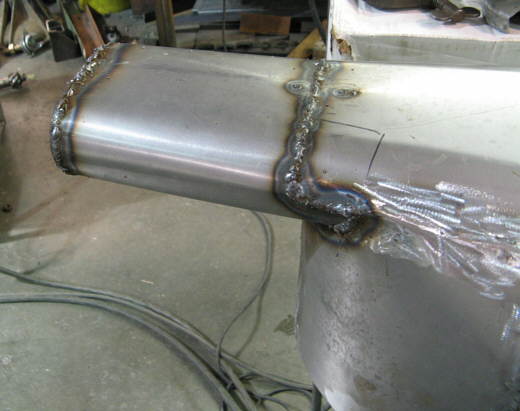
Here you see the piece made from the pattern above that finishes our enclosure out to the front of the snout.
.................bb.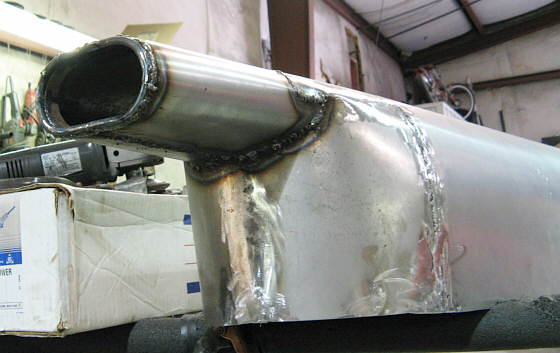
So now we have an enclosure that will slide forward and off of the snout/plenum inner structure.
..............b..b..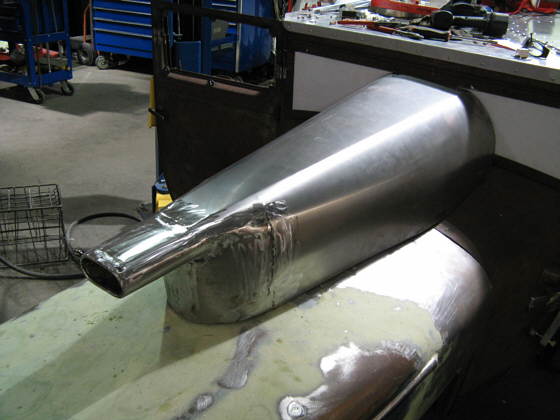
The finished outer enclosure with the welds ground down. Remember this all slides off the the inner enclosure so we can change parts of the inner enclosure for different carbs. He is taking a 1000 cfm and a 850 cfm carb with him.
.............bb.....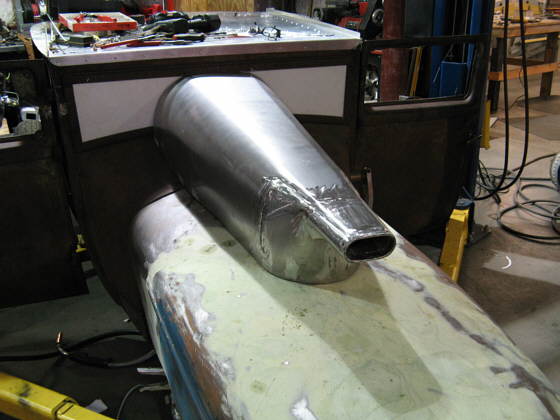
Another picture. You can also see the finish bondo work on the hood at this point. The scoop enclosure is held to the inner assembly and the car with a couple duzes fasteners on both sides.
..............bb....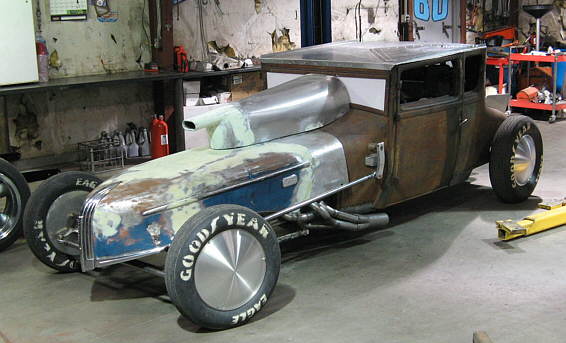
Here I have finished with the bondo on the outer scoop enclosure and also a view of the headers Phil is making for the car. If you get a chance at b'ville look at the nice work he has done on the car along with Bill and Jake.
................bb.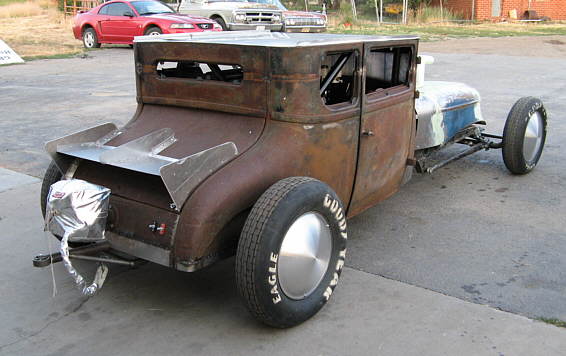
A back view of the car. Later when he finds some material the spill plates will be made as large as the rules permit. You can't really see it here, but he has an escape hatch built into the roof of the car. A couple weeks to Speed Week and still work to be done, but I think he will make it. c ya, Sum
................... and on the salt ...........
................bb.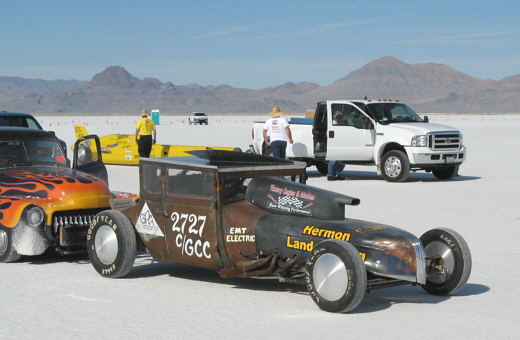
................bb.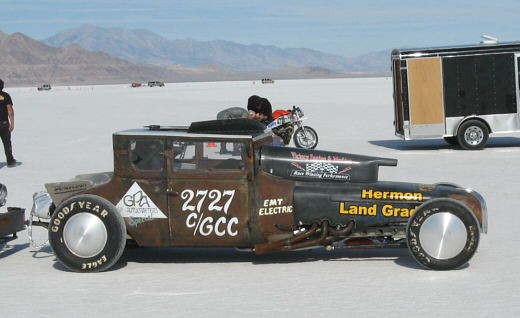
................bb.