- Page Five .................................... Page Seven
............................................... Teardrop Trailer Page 6
Inside Skin -- I skinned the inside of the trailer first with .032 aluminum. This proved to be faster than waiting until the outside was done, although it did try my patience. I attached the skin with pop rivets and only put a few in at first in case I had to remove it.
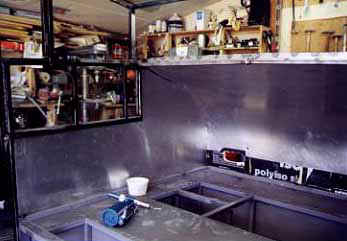
Inside Skin -- Same area as shown above, except from the inside. The rivet gun came from Harbor Freight. The hole in the back is for the taillight assembly.
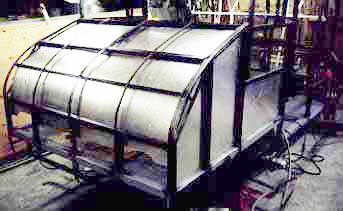
 Outside Skin -- The outside skin is 20 gauge cold rolled steel. I
cut most of it with electric shears (should have bought these years ago-came from Len's Autobody Shop on the net
[see my favorite sites]). I also used hand tin snips. I bent some of the bends on the the bender I made (see pictures
of bender elsewhere). I used a hammer and dolly to form the bend over the top. This worked really fast and better
than I hoped for. I did cut some shore relief cuts on the areas where the top follows the teardrop shape. At
this point the side is not attached (except for the bends holding it in place) as I pulled it and did the inside
first as mentioned above.
Outside Skin -- The outside skin is 20 gauge cold rolled steel. I
cut most of it with electric shears (should have bought these years ago-came from Len's Autobody Shop on the net
[see my favorite sites]). I also used hand tin snips. I bent some of the bends on the the bender I made (see pictures
of bender elsewhere). I used a hammer and dolly to form the bend over the top. This worked really fast and better
than I hoped for. I did cut some shore relief cuts on the areas where the top follows the teardrop shape. At
this point the side is not attached (except for the bends holding it in place) as I pulled it and did the inside
first as mentioned above.
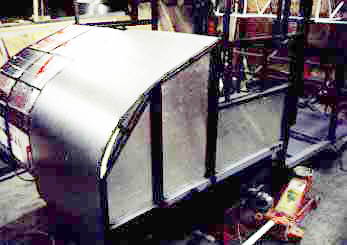
Insulation -- This picture shows the inside skin on and the insulation (1 inch faced foam board) in place on the top on the left side. The right side of the top has the insulation in place and the 20 gauge is tacked in place. Next will come the insulation in the side and then the side panel will go on for the final time.