..................
......................................--- Tohatsu Outboard Lift ---
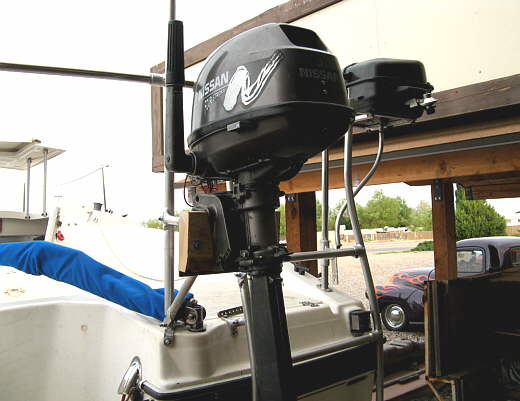
In 2010 we bought a Tohatsu 9.8 HP with electric start. One of the primary reasons for buying it was safety. We wanted to make sure in the future after our mishap on Lake Powell that Ruth could start the outboard or that I could start it if injured. This was especially important to us as we like to sail in remote areas were help isn't always readily available or one of us could fall overboard.
It doesn't do much good to have an outboard that anyone on board can start if they can't lower it into the water if it is tilted up during sailing. When you get into 8-9 HP outboards your are usually talking about 90-100 lb. objects that are hanging off the back of the boat and hard to get to even for someone in good shape. Also it is nice to have some easy way to tilt it forward while sailing without killing yourself doing it.
I use a cheap block and tackle with the previous Honda and that is documented ( HERE ). The Tohatsu/Nissan is even easier to do the same with as you will see. I needed one lift line and two control lines with the Honda, but this outboard only needs one lift line and one control line to release the bail to lower the outboard.
In the pictures you will see both the cheaper pulleys that I had used with the Honda and the newer Harken pulleys that we are using now. I thought they would hold up in salt water better.
.......
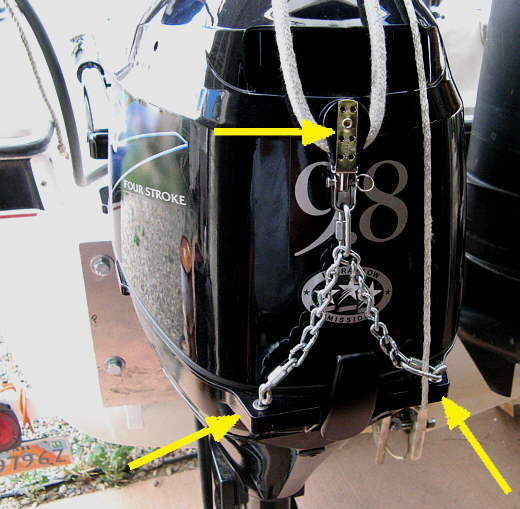
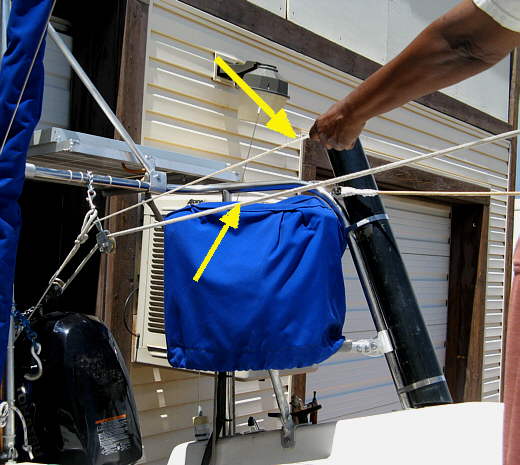
The top arrow points to one of the two small Harken pulleys being used. The Honda and the Tohatsu both (maybe all outboards do) had the ears at the back (bottom arrows) that provide a convenient attach point for the lift system.
.......
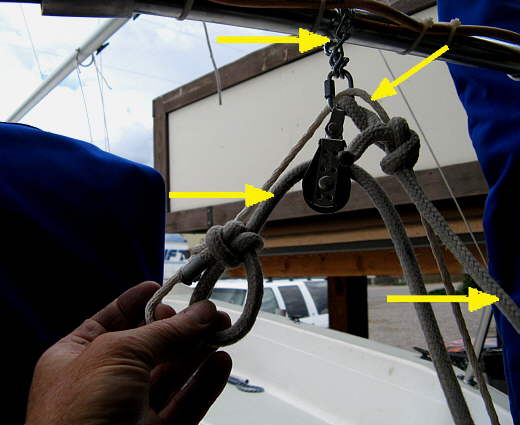
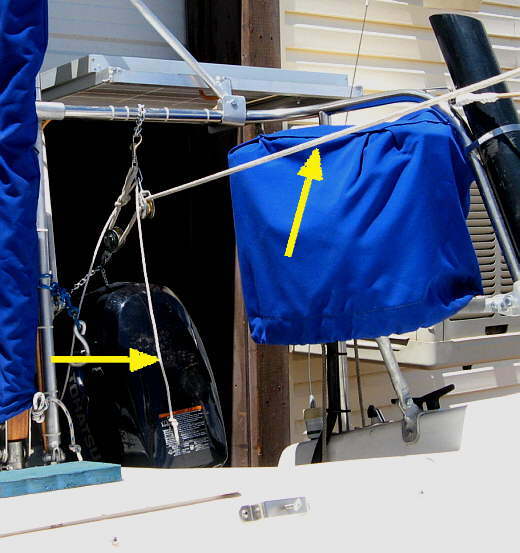
On the top if you have a rail/pushpit around the back of your boat you are all set. I attached the top pulley to it with a short piece of small chain (top arrow). The bottom right arrow points to the lift line that attaches up by the chain and then goes down to the bottom pulley and back up and through the top pulley (bottom left arrow). The top right arrow points to the smaller control line that.............
.......
..... goes down to the bail release lever (bottom right arrow). Nothing fancy needed here just route the line down around the back (left arrow) to the lever.
.......
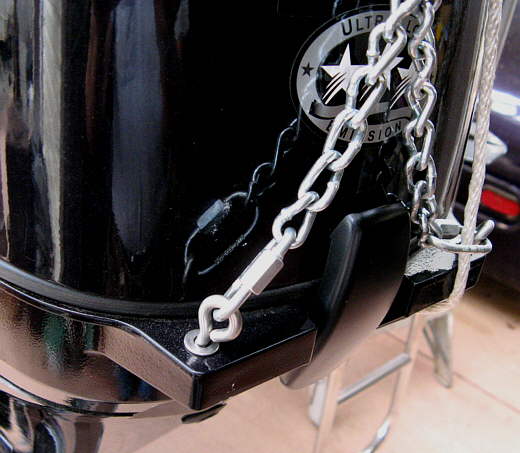
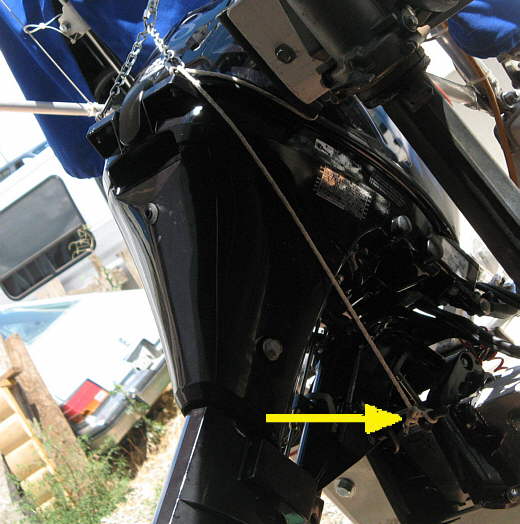
Drill the ears out in the back and put in a couple stainless eyes and a short length of chain and attach the bottom pulley to the chain.
.......
Here Ruth is pulling the outboard up. Notice that since she can brace herself against the lazarette that this is quite easy to do. There is no way she could tilt the outboard up or down without the block and tackle and I would have a very hard time myself.
.......
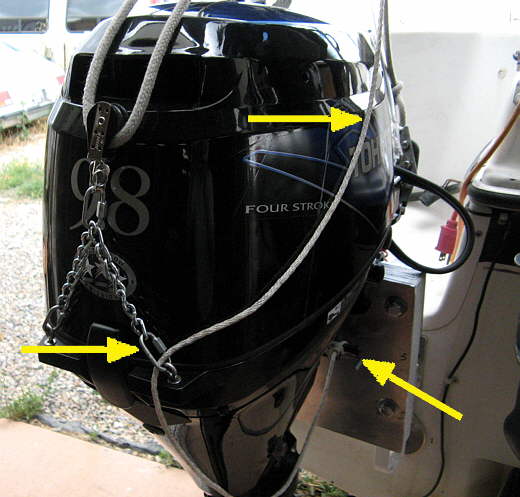
Here you can see that the lift line (right arrow) is taught and the control line (left arrow) is just hanging there. You don't need it lifting the outboard with the Tohatsu like was needed with the Honda.
.......
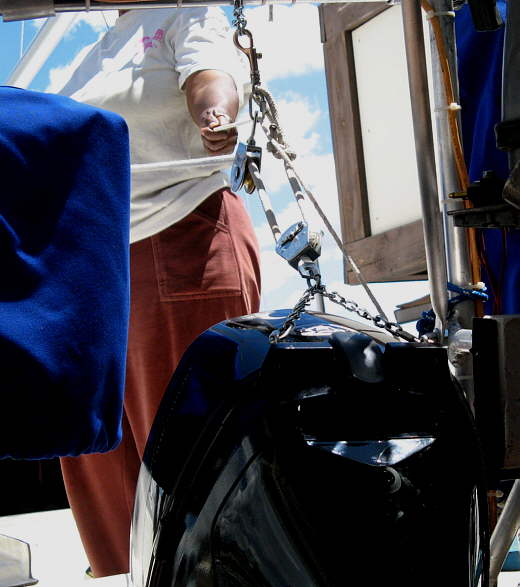
Here she is preparing to drop the outboard back down. She pulls it forward slightly with the lift line to take tension off the bail (lower arrow). Then she pulls the control line (top arrow) to release the bail that holds the outboard up. It doesn't take much of a pull on the control line.
.......
Once the bail is released (bottom arrow).....
.......
... she can start to lower the outboard with the lift line and then release the control line once the outboard starts to go down. There again you had to hold the control line longer with the Honda or it would catch in the lower tilt position.
.......
Walt had mentioned that with the outboard up when the boat heeled from side to side that the outboard could flop from side to side. In our case if it did this it would hit the side of the dinghy outboard mount shown in the picture above.
.......
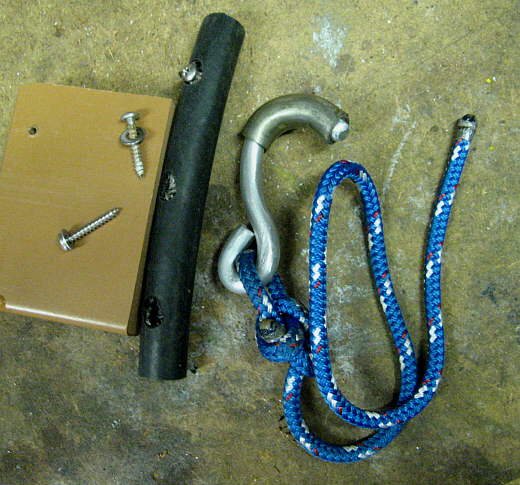
To stop it from swinging and to protect if from the side of the upper mount I used the above pieces. The rubber hose is for a cushion stop on the side of the top mount. To stop if from flopping around I bent a piece of aluminum round stock into a hook and covered the end with some tubing.
.......
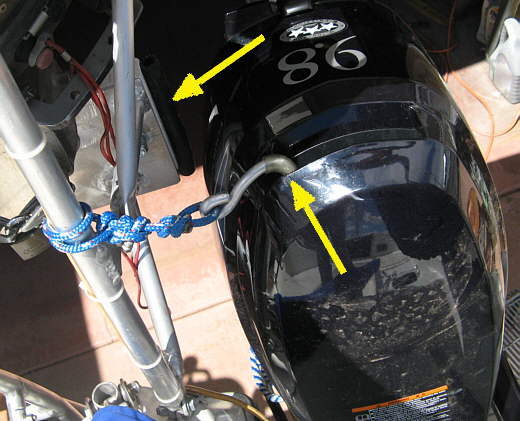
The hook fits into the hand-hold on the top back of the outboard (bottom arrow) and holds it over against the rubber stop/cushion on the side of the top mount (top arrow).
.......
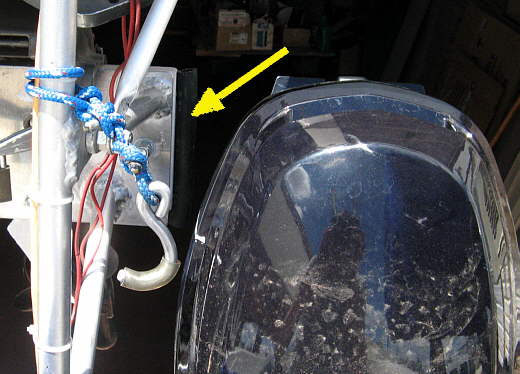
Here you can see the stop a little easier. The line/hook are attached to the upright that is the mast crutch support when the mast is down while trailering.
This is an easy quick mod with a big payoff.