...............Our MacGregor Index Page.....Mac 26S Rigging Mods Index Page
............................. Previous Page............................... Next Page If There Is One
=======================================================..................
--- Shoreline Release Bridle with Trip Line ---
=======================================================
A number of times when anchoring if the conditions are right we tie the boat to shore with a ....................
..........
........... shore line off the stern and sometimes now at Lake Powell where it can be hard to use an anchor due to the bottom dropping away so quickly we will also use a line off the bow of the boat and tie up to shore with both a........
.........
.......... bow and stern line. When you run these lines it usually means two trips to shore, one to set them and one to release them. On our second trip sailing, July of 2009 to Idaho/Canada, I made a trip line that in conjunction with a bridle could be used with a shore line so that you didn't have to go ashore to release the line. I had heard about these lines that use a bridle to go around the tree or rock you are tying to, but had never actually seen one of the bridles and how it was set up. Knowing you could do it I came up with what you will see below. I don't know if it is how others do it, but it has worked for us with good results so far. There are still some times that I don't want to use the trip line and bridle and don't.
...............
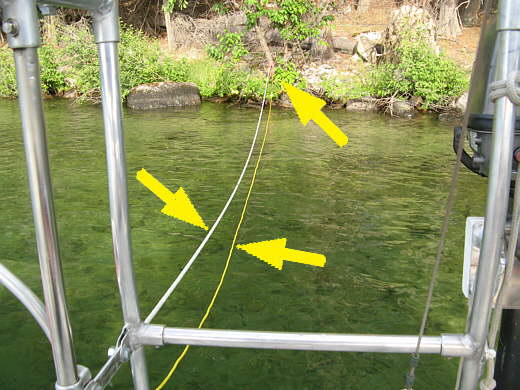
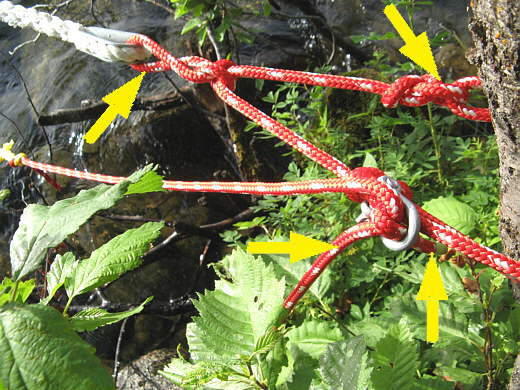
This picture shows the shore line that is actually holding the boat on the left and the trip line (lower right) that goes to the bridle that is attached to the shore line and goes around the tree (upper right arrow).
...............
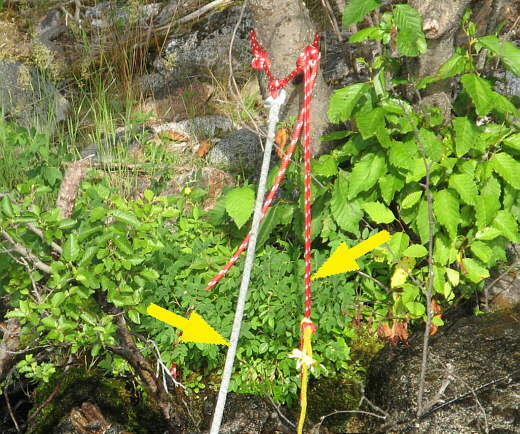
Here is a close-up of the bridle around the tree and the trip line (right) and shore line (left). Now let's see if I can explain how what I came up with works.
...............
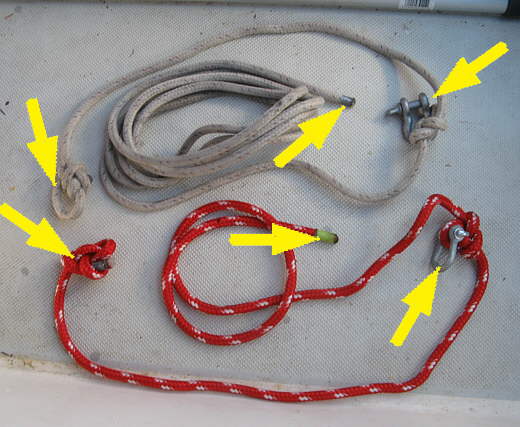
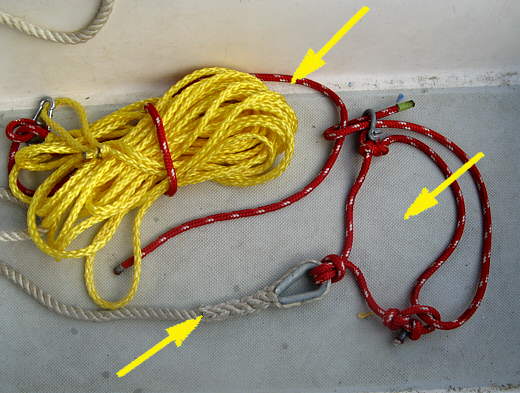
Here are two bridles, one with a longer line to go around a tree (top) and the other to use on trees that aren't so large. Both have a loop made with a bowline knot on the end of the line (left two arrows). Then a short ways down the line I tied in a clevis with another bowline knot (right two arrows). This part of the bridle stays in front of the tree. The long part of the line past the clevis that ends at the middle arrows goes around the back of the tree in two directions. I'll explain all of this a couple times in case the pictures aren't too clear as to what is going on.
...............
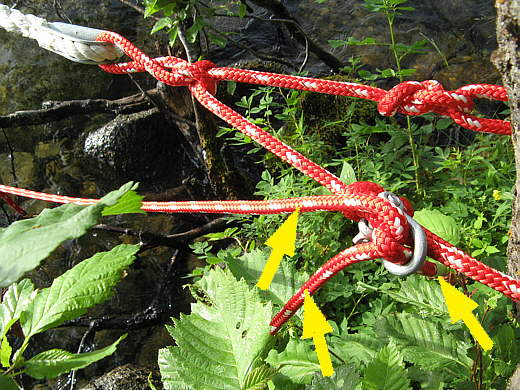
First, and you can do this before going ashore, tie the shore line to the bridle between the end loop and the clevis (top left arrow). To set the bridle you take the end of the line past the clevis and take it around the tree to the loop on the far side that is on one end of the bridle(top right arrow) and put it through the loop and back around the tree back to the clevis. Then run the line through the clevis and loop it right back through the clevis which leaves a short loop there (bottom right arrow). Put the trip line (bottom left arrow) through that loop for a couple feet and then pull the loop tight on the trip line. The trip line prevents the loop from being pulled back through the clevis.
...............
Here you can see how the bridle line comes back around the tree from the far side and goes through the clevis and then right back through the clevis and ends there (bottom right arrow). The trigger line comes from the boat (bottom left arrow) and goes through the bridle loop at the clevis and then hangs down free (middle bottom arrow).
...............
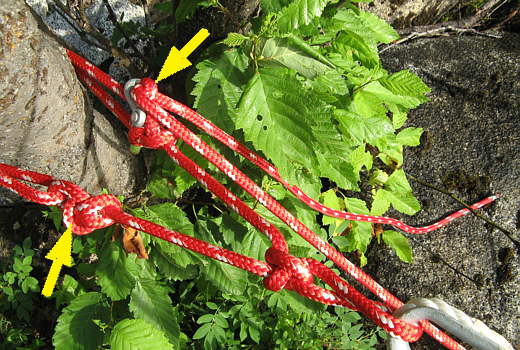
A top view showing the loop at one end of the bridle (left bottom arrow) and the trip line going through the loop at the clevis (top arrow). You can see the end of the trip line laying on the ground.
...............
Here is a view from the back side of the bridle. Remember that the right arrow points to the loop at one end of the bridle. The other end of the bridle comes around the back of the tree and through that loop and then back around the tree to the clevis where it is held with the end of the trip line.
...............
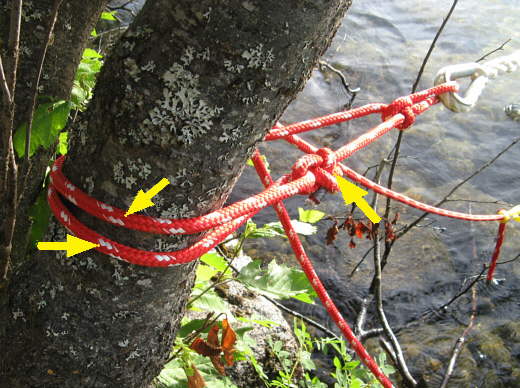
One last picture since this is kind of confusing with the tree in the other pictures. The tree goes where the right arrow is. The top arrow points to the trip line that is made up of a short piece of red braided line attached to some cheap yellow poly line. The bottom arrow points to the shore line that is actually holding the boat.
To release the line you pull the trip line so that it pulls out of the loop at the clevis. The loop at the end of the bridle line at the clevis is no longer captive then. The loop at the clevis pulls out of the clevis and is now free. The bridle is pulled towards the boat and the line slides around the back of the tree and runs through the loop on the other side and then the bridle is free of the tree and you can pull the trip rope and the shore line back to the boat.
...............
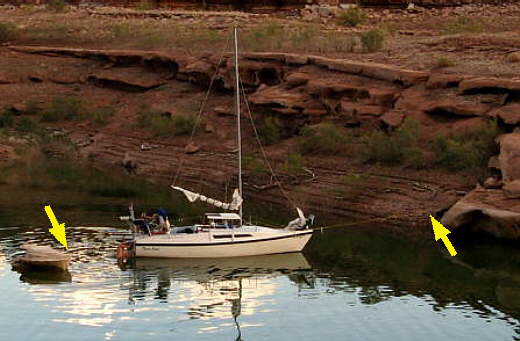
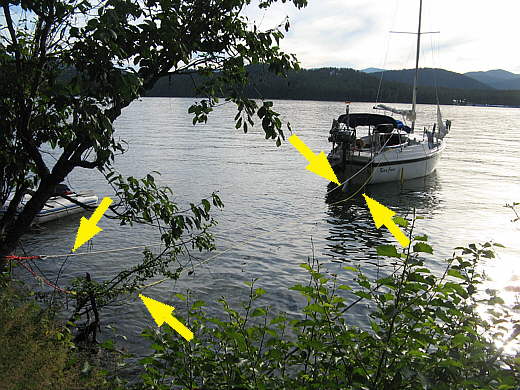
Here you can see the Mac on anchor with the shore line (top arrows) fairly tight and the trip line (bottom arrows) laying in the water.
One thing that can take a minute or two is that if you pull the trip line and can't pull on the shore line hard enough to pull the bridle loose it might take a couple minutes for the weight of the boat working on it to pull it loose.
Even though the trip line is not preventing the end of the bridle line where the loop is at the clevis from sliding out of the clevis it can be tight there and take a minute or so to pop free of the clevis. The times I have used it it has always come free, but if you were in a situation where it had to be free "right now" be prepared to take it loose at the boat and come back for it.
=======================================================
........................................................ Next Page If There Is One