............................... Previous Page.................................................. Next Page If There Is One
..................
..........................................................................--- Sub-Frame ---
..........
In addition to adding a second axle to the stock 1990 Mac Trailer I also wanted to beef the trailer up and extend the length of the trailer and add a third bunk. On this page I'll go into making the stock frame beefier. There are numerous ways this could be accomplished. I chose to make a sub-frame to go under the original frame.
......
The first order of business was stripping all of the other trailer mods I had done to the trailer, which wasn't hard as they were all bolted on. I decided that the trailer wasn't in that bad of shape and that most of the rust was surface rust. If we would of made or bought a new trailer then I would of had a hard time adapting my previous mods to the trailer and didn't want to give them up.
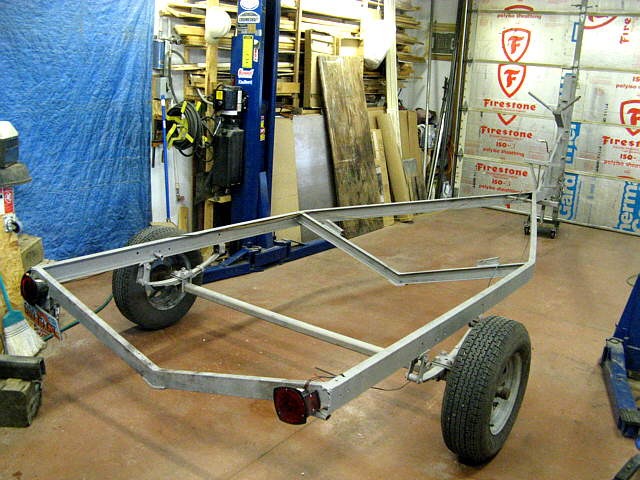
We paid about $280 to have the trailer media blasted down to bare metal over in Cortez, CO. This gave me a clean rust-free frame to work with and was well worth the expense. Above is the bare trailer and you can see there isn't much to one. I feel that Roger designed these feeling that most owners were not going to trailer their boats very far, so why build a more substantial, read more expensive one, when this trailer would meet most peoples needs.
We are a long ways from the nearest lake and like to travel to different waters in and out of the country, so for us a trailer upgrade was almost a necessity if we were going to trailer safely. Also out boat has a lot of add-ons and we like to travel with the main and dinghy outboards in place and at times with 19 gallons of gas and 40 gallons of water in the boat on the road along with other provisions for longer trips. That way when we get to our destination we are ready to put in the water and go. All of the above adds a lot of weight to the boat/trailer.
......
Above is the front of the trailer that is pretty much stock at this point except for the spare tire holder just to the aft of the ladder.
......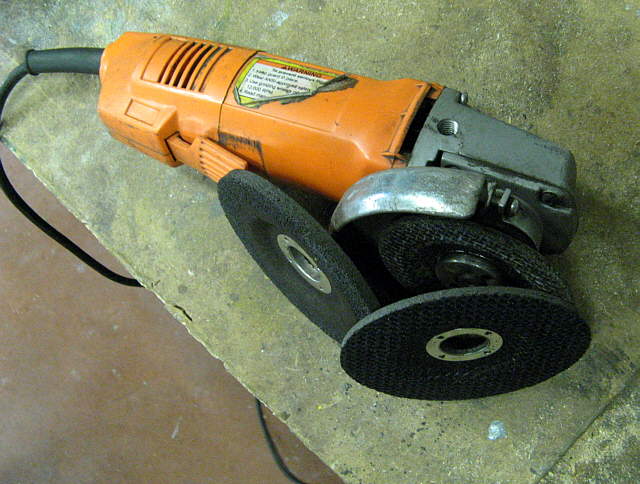
I used a grinder with some thinner cut-off wheels to....
......
... grind almost through the spring perches on both...
......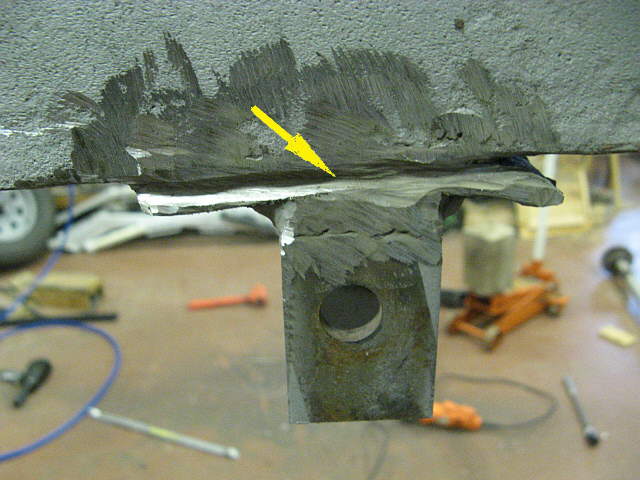
... sides taking care to try not to grind into the frame rail much. Then ....
......
... I was able to take a sledge hammer and knock them off and do a little finish grinding.
......
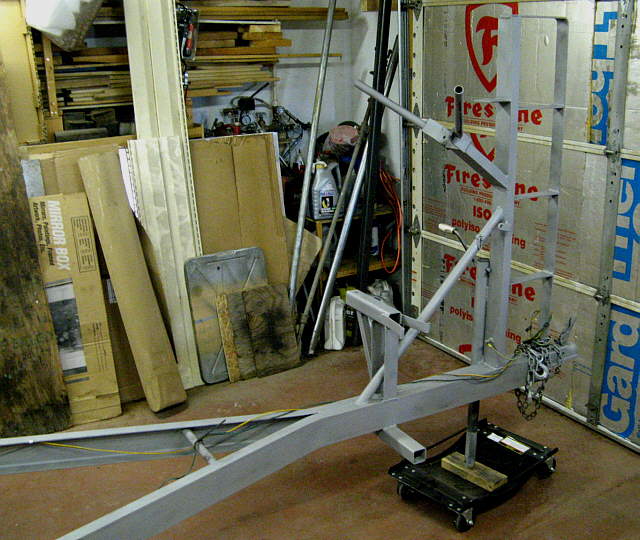
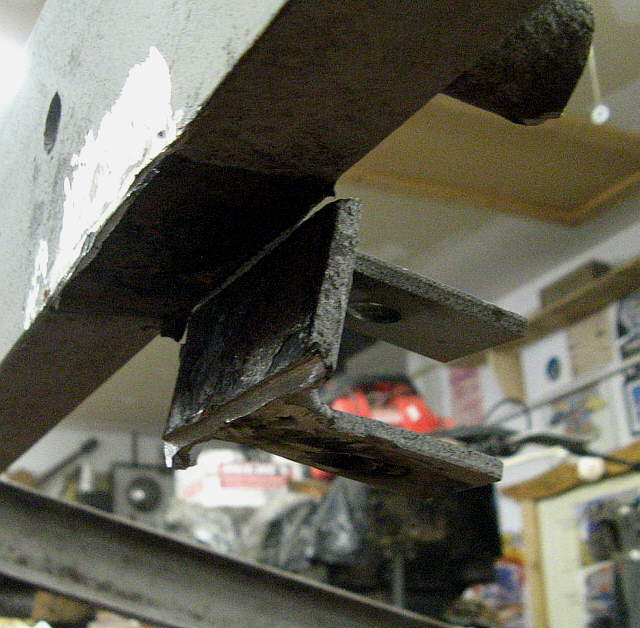
At the back of the stock frame I needed to cut off what was left of the original side goal-posts and also flatten out the welds on the back of the frame rail where I was going to extend the trailer lengthwise.
......
I used a saw and grinder to ....
......
Accomplish that.
......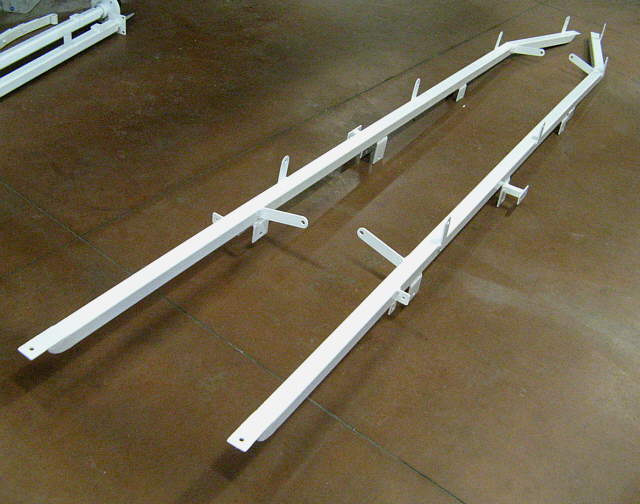
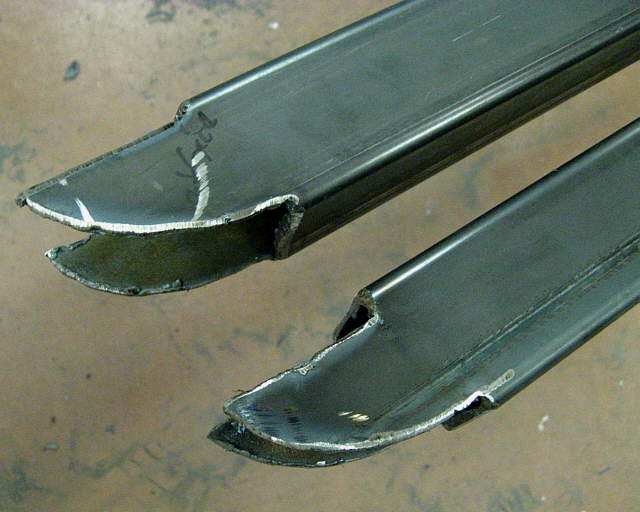
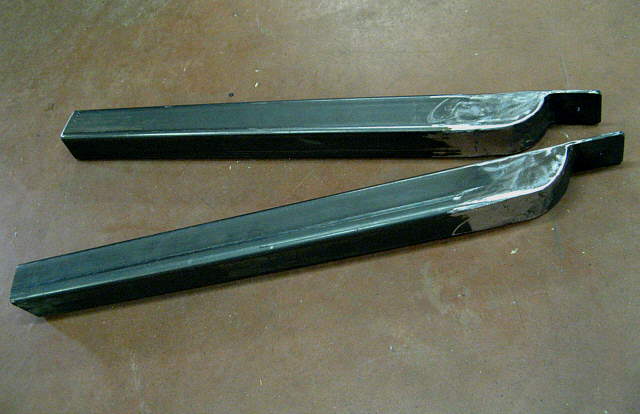
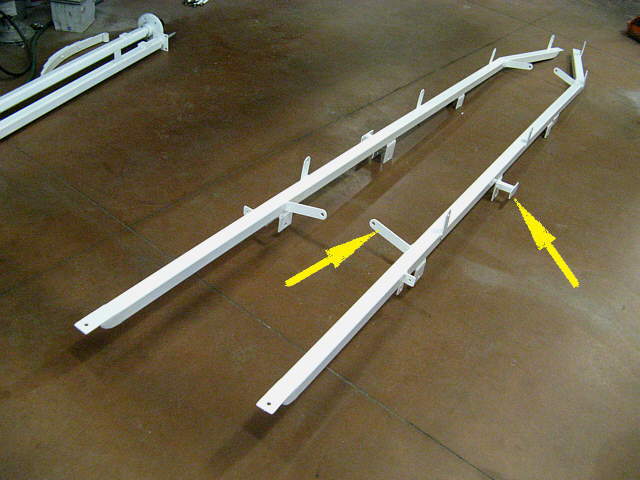
Here are the finished sub-frame rails, so that you have an idea in the pictures below what is happening. I used 2 X 2 .120 wall mild steel square tubing to make the main rails. These wouldn't be strong enough to build the trailer with from scratch, but almost double the strength of the original rails. The further up the tongue you go the less the loading, so these don't go all the way to the front or the rear of the trailer. They do go back past the end of the original frame rails and help to tie-in and strengthen the new aft addition to the trailer where the third bunk is.
......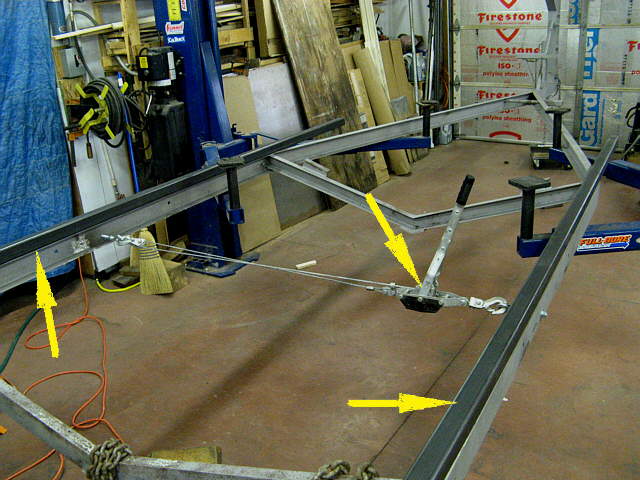
Here the sub-frame rails are lying on top the the trailer rails so that I can get an idea of what is going on and how far up towards the tongue that they will go. I noticed that the trailer frame rails were bowed out some and at this point pulled them in and straightened them with the come-along, top arrow.
......
I wanted to box the ends of the new rails in so that moisture wouldn't get in them and cause rusting and also needed to attach then ends of them to the main rails. To do this a simple pattern was made of how I wanted the ends to look and a line was marked on the tubing.
......
I cut the ends on the line with a plasma cutter and also notched out the top sides in the same area.
......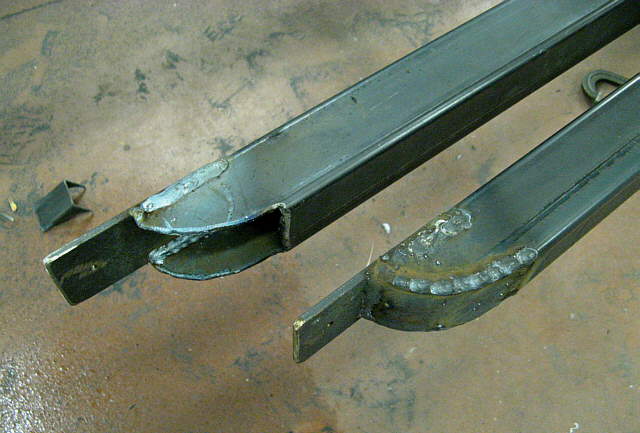
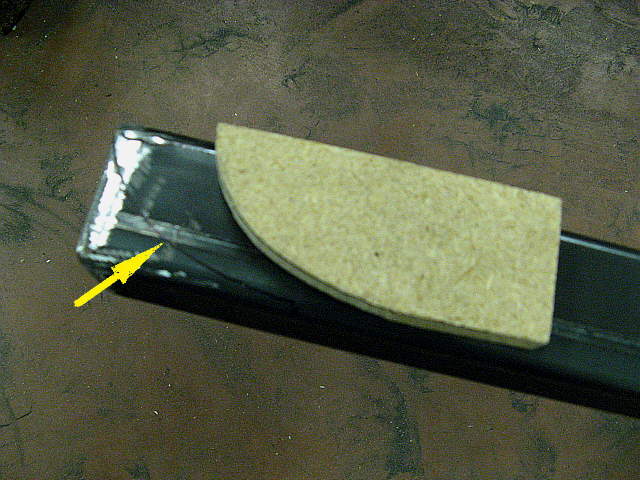
Next 3/16 inch strap was welded in on the top sides and the bottoms to close off the ends of the rails and the extensions will form a tab where these can be bolted to the bottom of the new frame rails at the rear of the trailer.
......
A little grinding and they finished off pretty nice.
......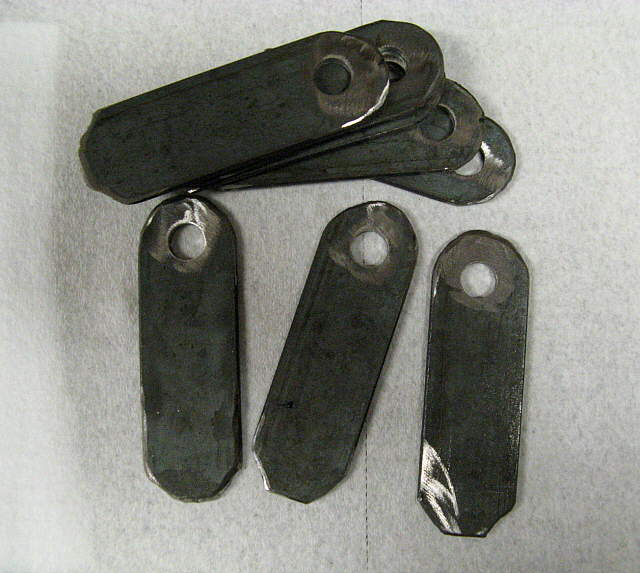
Next some tabs where made, rounded with a hole for a bolt at one end and kind of triangulated off at the other.
......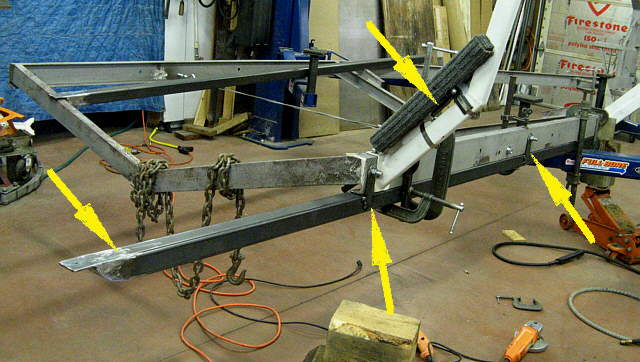
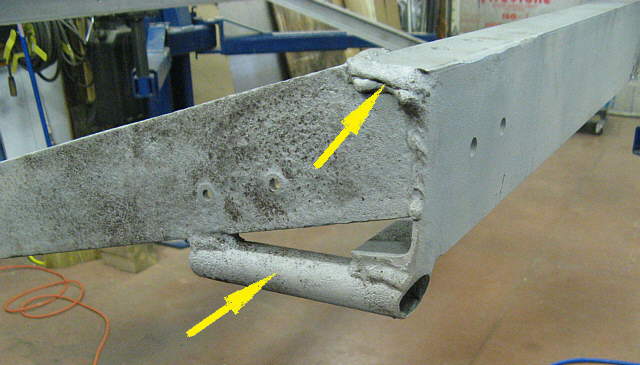
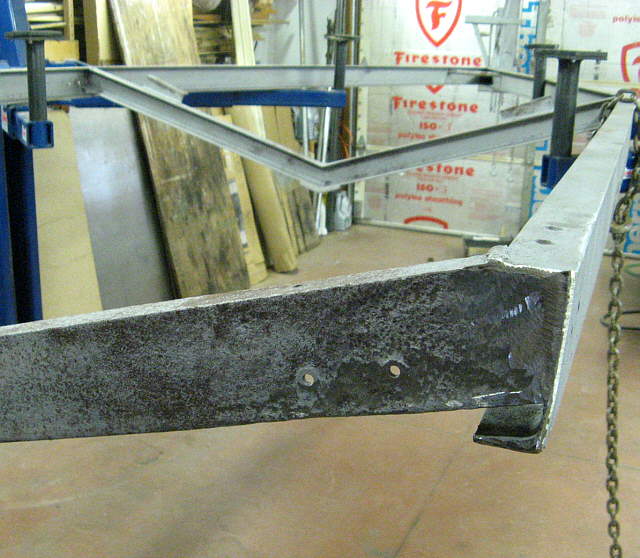
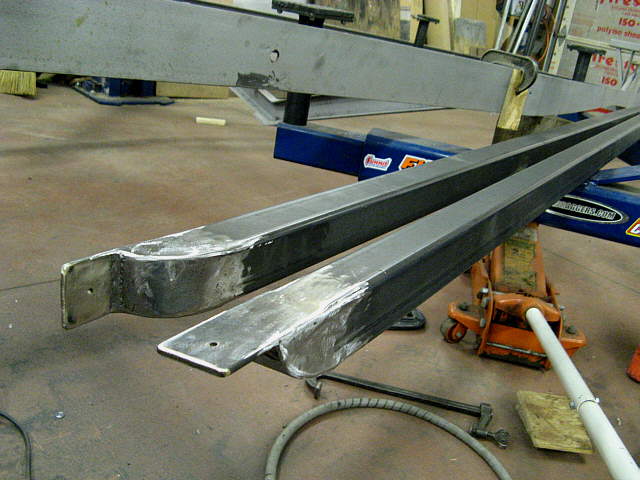
Holes were drilled in the stock frame and the tabs were then bolted on and weld on their lower ends to the new sub-frame. The left arrow points to where the sub-frame extends past the original frame. There will be new frame rails above at this point. The top arrow points to the goal-posts for the side bunks. I attached them temporarily so that I wouldn't weld anything in their way.
......
The above picture is on the forward end of this part of the sub-frame where a tab was also placed. There again the bunk support is in place. The left arrow points to a temporary piece used to hold and position the new sub-frame rail.
......
Next new spring perches for a tandem axle were tacked into place for later welding. The back spring perch is located right at the back of the original frame. I'd seen were a couple people who hadn't extended their frame had used this location with reported success and it has worked for us.
......
Next the fronts of the sub-frame rails were cut and boxed in.
......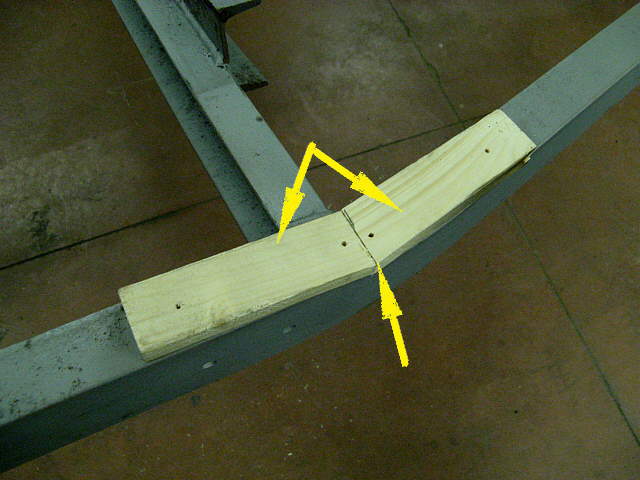
They attach to the previous made rear ones right where the frame takes off at an angle for the front of the tongue. I cut a couple pieces of wood to check the angle for cutting the new rails so that they would butt up against each other for welding.
......
The the fronts where clamped in place and welded to the rears, left arrow. Also a tab was put on them, right arrow, so that they could be bolted to the original frame.
......
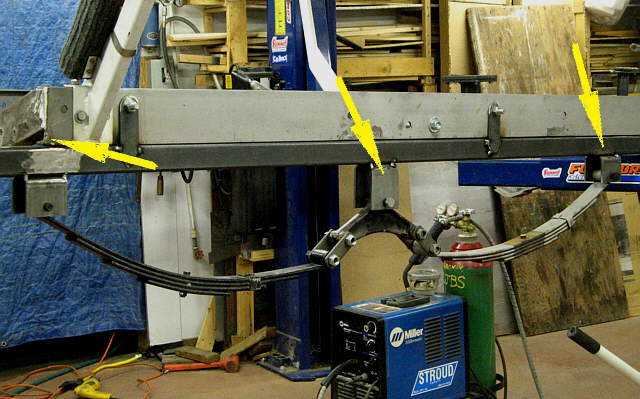
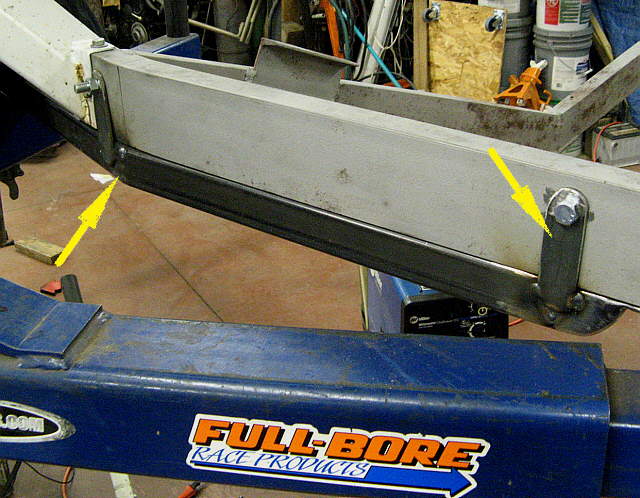
They were also welded on the inside, left arrow, and later also on the bottom and top of the joint. The two right arrows show where the leading part of the sub-frame bolts to the trailer rails in two places in this area.
......
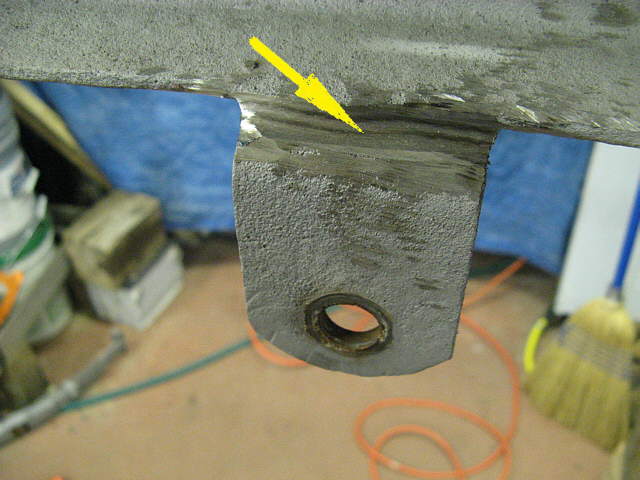
To strengthen this joint the insides were ground smooth and ...
......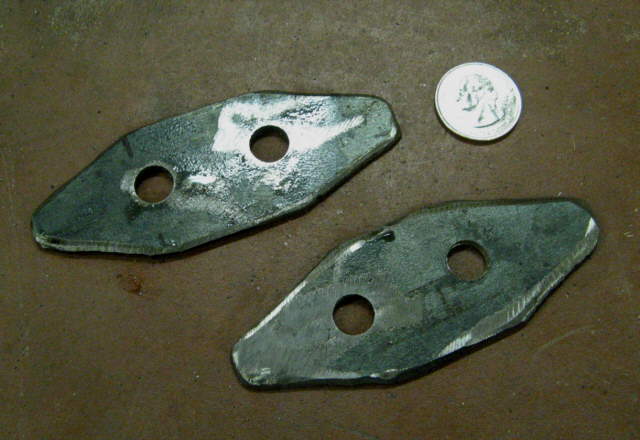
... these diamond shaped pieces were cut out and then welded...
......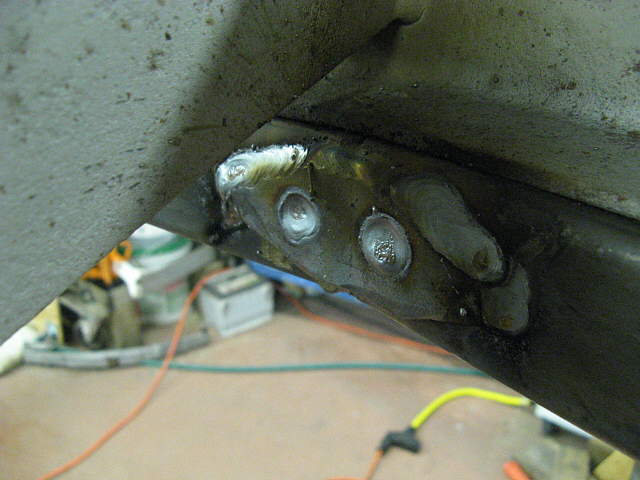
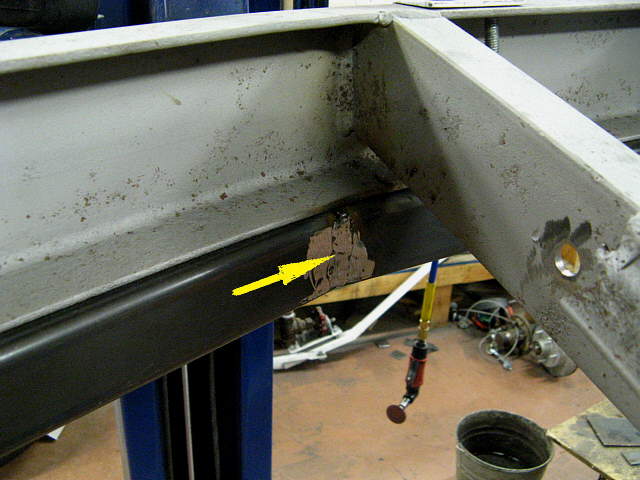
.... onto the rails overlapping the joint. The center holes were plug welded. The diamond shaped pieces are much better than welding on rectangular pieces that can put more of a shear load on the area. Similar ones were welded onto the outsides of the rails.
......
A strap was also welded to the frame at the joint and then run at an angle up to the cross-member there and bolted to it.
......
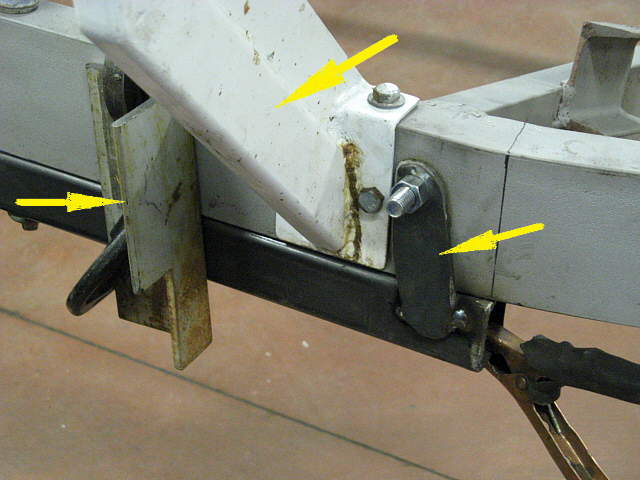
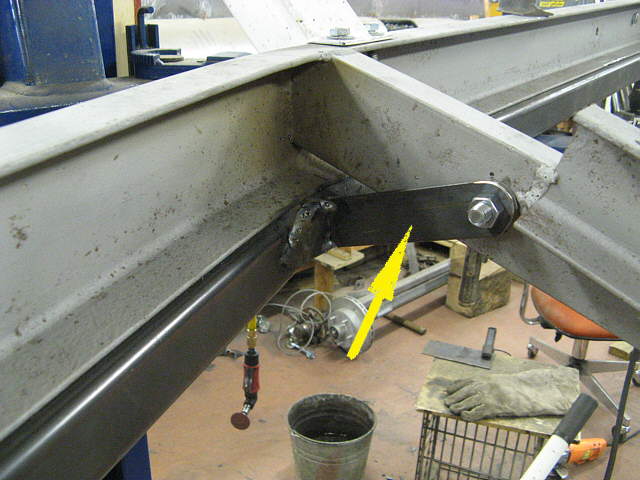
The left arrow points to a similar diagonal brace at the original cross-member at the end of the original trailer. The sub-frame could of been welded to the bottom of the original frame rails, but I didn't like that as felt that it would be a prime place for future rust. The trailer and the sub-frame was painted first with a good epoxy primer, 2 coats, and then with a good single stage acrylic top-coat, the white. I bought the paint from Summit Racing. Good prices and they ship to me out in the middle of now-where.
The right arrow points to a bracket where the fender attaches and will be addressed on a different page. I was happy with the way the sub-frame came out and so far with about 5000 miles on it, summer of 2011, everything has worked as hoped for.