.......................................Endeavour Index Page............Plumbing Mods Index Page
....................................................Previous
Page..............................
Next
Page If There Is One
======================================================================
.................................--- New Larger Holding Tank -- Part I ---
======================================================================
Out Endeavour came with a 15 gallon holding tank and the smell from the old holding tank and lines from the head to it was not very pleasant. We knew from the moment we decided to buy the boat that new hoses and a new tank were going to be in order right off the bat.
Before we left the boat after buying her in 2011 I cut the V-berth platform as will be shown below so that the stock tank could come out and so that it would be easier to install new hoses. We had a contractor remove the tank and he removed most, but not all the hoses also after we left. We had to remove the remaining hoses when we returned.
As I write this (fall of 2012) we had returned to the boat and worked and lived in her for 3+ months during the previous spring/fall. I was pretty involved with other mods that have been documented and didn't do much with the holding tank and hoses as we never got the boat in the water and couldn't use the head up on the stands in the yard.
As you will see below I did do some modifications so that a larger 20 gallon holding tank will now fit in the space under the V-berth. The plan when we go back is to use PVC for as much of the plumbing as possible with hose on the ends of the PVC to accommodate some vibration and such in the lines. Also we are going to move the pump-out hose/line to the port side of the V-berth and have it run straight up along side of the hull there and will box it in. We don't use a full-width mattress anyway so that area is free. The stock pump-out line is very convoluted in the way it left the tank and then went past the head and up and out at the aft corner of the head where it was about impossible to get to due to the cabinet there. I'm sure effluent would settle in the low spots of that line. The new more direct one should work much better and be easier to service if that is ever necessary.
I'm still not sure at this time how the tank will be plumbed but since I don't see us out past the 3 mile zone all that much I'm thinking instead of a Y-valve that would divert sewage to either the tank or the thru-hull that all of the effluent will go to the tank. Then if we are out and want to dump we will open a valve at the bottom of the tank and pump out via the thru-hull. This way the thru-hull will normally always be closed along with the valve at the bottom of the tank. There will also be a valve in the pump-out line that will tee off of the bottom discharge line that goes to the pump. That valve will remain closed except if we are getting the tank pumped at a marina. This will allow the pump to work without pulling air from the pump-out line. It might not be needed with the cap on the deck end of the line in place, but most all of this will be PVC and those valves don't cost much. At the moment the above is the plan and the more I think about how we will use this boat coastal cruising and sitting on anchor I think that it will serve us well and be less complicate/expensive that other options. If we were planning on crossing oceans then we would put in a Y-valve for sure and this would be easy to do at any point in the future.
Ok so let's get to work.
..............
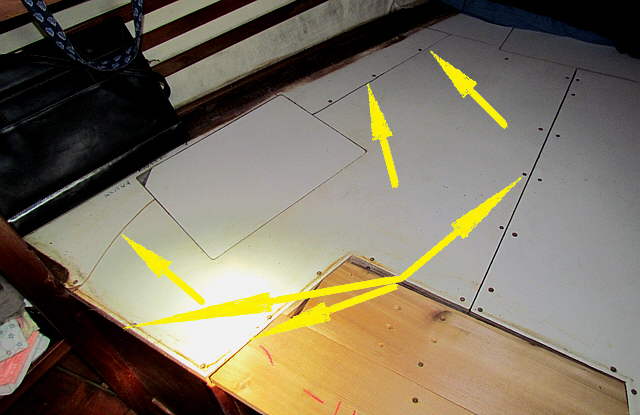
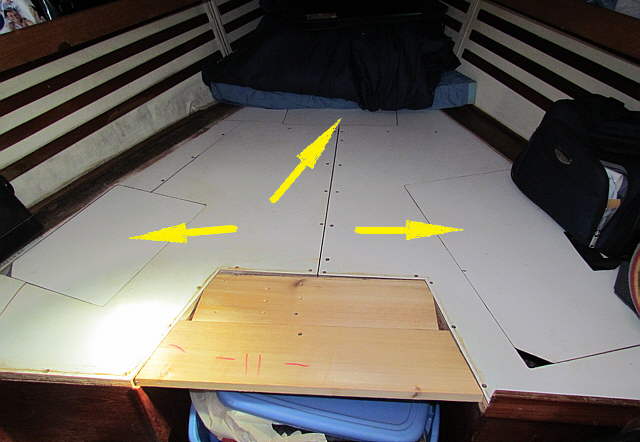
This first part was done in May of 2011 to facilitate removing the holding tank and hoses. The V-berth has 3 access hatches, arrows, but you can't get the holding tank out the one on the left where it is located. You also can't remove the platform even though it has screws on some edges as it is fiberglassed to the side of the hull (or at least ours is).
..............
I got out the saber saw and made two cuts. One were the bottom left single arrow is, from the hatch opening to the front edge of the platform (actually aft edge in the boat). A second cut was made from the forward side of the hatch to the area by the foremost hatch, top two arrows.
Next all of the screws were removed where the bottom three connected arrows point.
..............
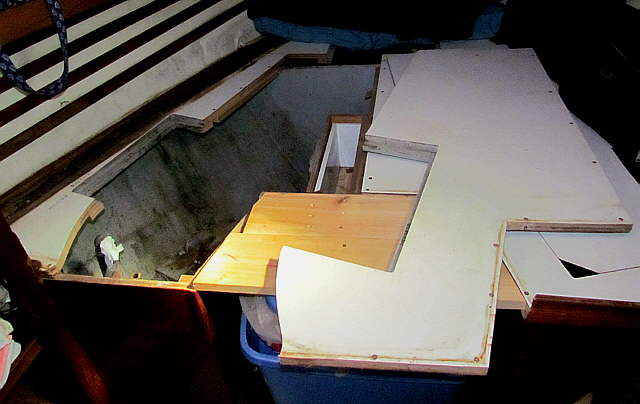
With that done the whole section shown above lifts out for easy acess to the whole area.
..............
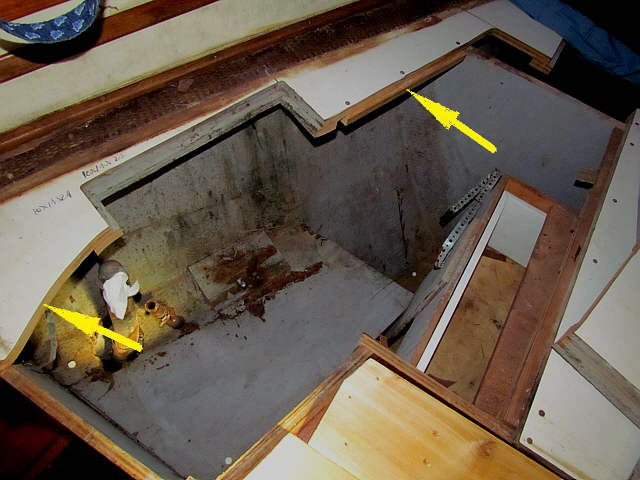
A piece of lumber was then screwed along and under the top cut in the picture, top arrow, to provide a supporting lip and a place to screw to when the platform section is replaced. I'll probably also do that where the bottom arrow is, but it isn't really needed there as that is a short span.
..............
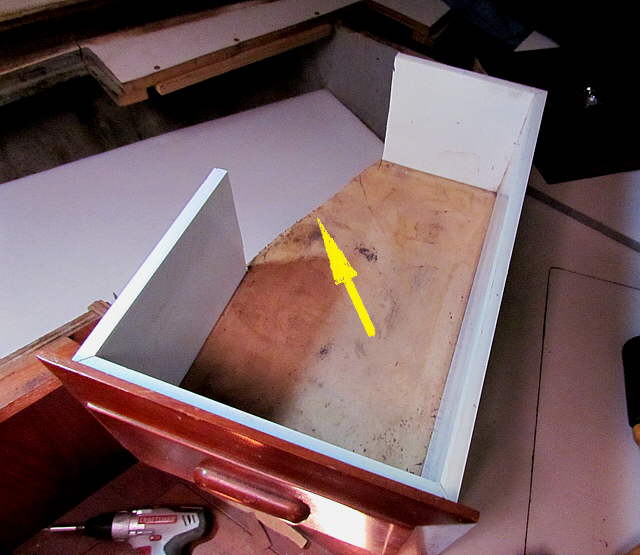
At this point you could put a 15 gallon or less tank back into the space, but we wanted to go to a 20 gallon. For it to fit something had to be done to the corner of the storage drawer and the area under it as a 20 gallon tank needs to fit into that area.
..............
No problem if you are welling to sacrifice a small amount of space in that drawer for 30% more holding tank capacity, just cut the corner of the drawer off .....
..............
.... with the trusty saber saw.
..............
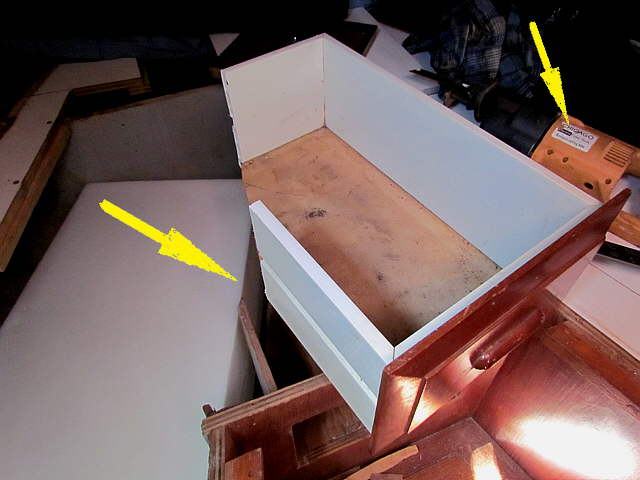
With the corner of the drawer cut off and some of the shelf under it the tank will now fit the compartment. The area directly under that corner of the shelf was also cut out with the larger saw, top right arrow. I also put in a new support for the bottom shelf there that doesn't show in the pictures, sorry.
..............
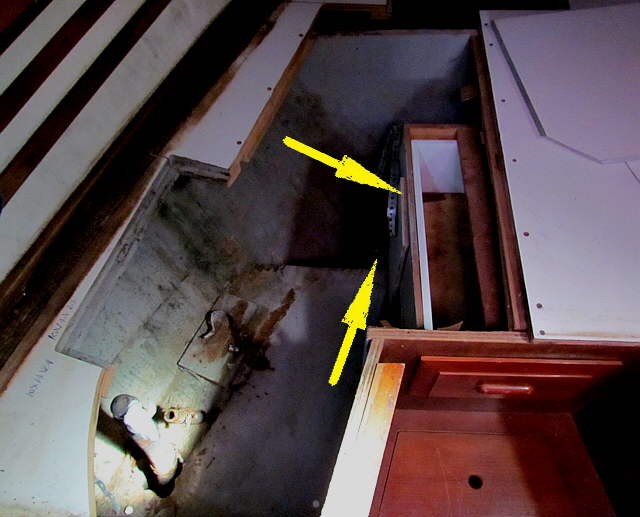
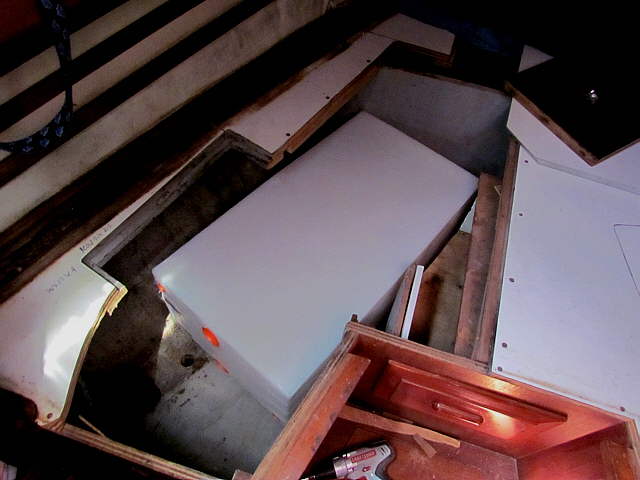
The far left arrow points to where the new pump-out line will exit under the platform and ascend next to the hull to the deck above where there will be a new fitting with a cap. After it is in it will be boxed in with some lumber that can be removed if service is ever necessary.
Also note all of the area at the end of the tank, bottom arrow. That will help in pluming the input into the tank and the discharge and the discharge pump that will probably be a manual pump. The discharge from the pump can go straight down to the thru-hull below that will always remain closed unless the tank is being emptied out past the 3 mile zone.
The pump-out line will tee in just before the pump and there will be a valve in it above the tee and another before the pump that can be close if the pump needs service.
The tank is a Todd (Todd Model #: 85-1666WH ).
..............
This what things looked like when we left the boat. Upon return I'll secure the tank in the compartment and run lines to and from it. I also hope to run two vent lines from the tank as I've read that having two will help to keep the tank aerobic. There is a post on that ( HERE ).
Some could argue that the cut-out above might of weakened the boat some, but I doubt much with the two cross bulkheads in that area and since I tied the cut-out back in with the support pieces under the cut lines. We also don't plan on crossing any big oceans, but even if we were I would not loose any sleep over what was done.
I'll add to this mod when it is finished.
===================================================================================
.................................................................................. Next Page If There Is One